On A Rail Uncut - Re-Adding Cut Areas/Scenes (Expansion Project)

Mod Current Status:[/SIZE] Beta 2 has been released and is available for everyone to download! With the release of Beta 2, and my joining the Black Mesa Dev Team, as well as getting a new job, I no longer have the time to work on this mod, sadly. Sorry guys. I still consider On a Rail Uncut Beta 2 to be the finest piece of work I’ve ever created, and despite some of its problems, I’m still really damn proud of it, and more than happy to call it a “finished product”. I may come back to it one day, depending on how things turn out - but probably not. Thanks guys, it’s been a helluva ride!
Trailer for On a Rail Uncut Beta 2
ModDB/Download link for OaRU B2
Alternate download link
[/SIZE]

NAVIGATION/CONTENTS[/SIZE]

Introduction[/SIZE]

Hi there everyone,

I created the Surface Tension Uncut chapters, which can be found here on the Black Mesa Forums, and here, on ModDB. If you haven’t checked them out already, please, take them for a spin! They re-add the cut areas of Surface Tension with great detail and love.
Though it was a long and difficult project, it did not fully satisfy my mapping/creative appetite, nor did it satisfy my desire to have Black Mesa as the most complete re-creation of the Half-Life experience as possible. That’s why I’ve moved on to this contentious, divisive chapter from the Half-Life universe.

You can find OaR Uncut here on ModDB.

OaR was about the journey to the rocket (it’s supposed to be a fairly “epic” one - hence why Gordon had to use a tram, instead of just walking!), and Black Mesa’s OaR kinda missed the point of that - the actual straight line distance between the first map of Black Mesa’s OaR and the actual rocket launch center was approximately 300m (and that’s a VERY generous estimate, based off of a measurement done with Hammer, under the premise that 1 unit = 1 inch).

Implementation[/SIZE]

I am quite deep into development of OaR Uncut at this point - the first 2 maps (of 4) are almost ready for alpha testing, and the first media release has been done. My redesign principles mirror that of Black Mesa’s - I am attempting to streamline and refine the layouts of the missing maps from HL1 to avoid player confusion and make it overall a more fun experience for everyone involved.

Oar Uncut, once completed, will be released in 2 flavours: Lite and Full. The Lite package adds 2 maps to On a Rail: A1 and A2. Black Mesa’s OaR had 3 maps by default: A, B and C. A1 and A2 come after A but before B. The Full package will include A1, A2, B1, and B2, restoring On a Rail to its original HL1 length, hopefully without any of the tediousness or frustration. This way, there’s something for everyone. Loved BM’s OaR and how short it was? That’s cool, this project isn’t for you. Thought BM’s OaR was too short but don’t want it to be as long as it was in HL1? Lite package. Want it to be as long as HL1? Full package. Everybody wins!

Deciphering Map Jargon[/SIZE]

Okay, so there’s a fair amount of map jargon involved in this project which people unfamiliar with Half-Life mapping may find confusing. I’ve written a quick and simple guide here explaining precisely what each map is, and how they correspond to one another.

All the filenames for On a Rail maps are prefixed with C2A2. “C2A2” means that the map is part of the “On a Rail” chapter. I’ve left this prefix out to make things less confusing, but bear that in mind.

Maps are named with letters corresponding to their position in the chapter. The first map of “On a Rail” would be called C2A2A, and the second is called C2A2B, and so on. For the purposes of simplicity, I will just refer to them as A and B. Black Mesa has 3 maps for On a Rail - A, B and C. My maps slot in around their maps. Half Life had 10 maps for On a Rail - C2A2, A, B1, B2, C, D, E, F, G, H. In the key below, I will show which Black Mesa maps will correspond with which Half-Life maps.

BM_ = Black Mesa
HL_ = Half-Life

[COLOR=‘Red’]Red = Default Black Mesa maps. Untouched by me. Will not be decompiled, or edited.
[COLOR=‘Orange’]Orange = Black Mesa default map, which will edited by me, for a good reason.
[COLOR=‘Lime’]Green = New, made by me.

[COLOR=‘Red’]BM_A = Mostly uses content from HL_A (roughly the 1st half), plus a few new, original sections created by the BM devs.
[COLOR=‘Lime’]BM_A1 = Assimilates the leftover content the BM Devs left out of A, with a little original content of my own. Also contains a side room from HL_B2.
[COLOR=‘Lime’]BM_A2 = Corresponds almost identically HL_B1 and HL_C. HL_C’s Office Complex has been DRAMATICALLY expanded, so overall this map is a lot bigger.
[COLOR=‘Orange’]BM_B = Corresponds to roughly 1st half of HL_D, with an expanded Rocket Silo (plus new puzzle).
[COLOR=‘Lime’]BM_B1 = Will correspond roughly to the tiny missing portion of HL_D, and all of HL_E.
[COLOR=‘Lime’]BM_B2 = Will correspond roughly to HL_F and HL_G. Parts of HL_F and HL_G will be set outdoors, to add diversity to locales and to make things more interesting.
[COLOR=‘Red’]BM_C = Corresponds to HL_H, but with a new, original 1st half.

Media[/SIZE]

You can find a YouTube walkthrough of the first 2 (A Maps) featuring a developer commentary here.[/SIZE]

YouTube walkthrough of the 3rd (B1) map featuring a developer commentary here.[/SIZE]

YouTube walkthrough of the final (B2) map featuring a developer commentary here.[/SIZE]

Media Continued[/SIZE]

Conclusions[/SIZE]

Check back here regularly to keep an eye on current progress and releases!

Pitch Bible for OaR Uncut (Part 1)[/SIZE]
Contents and instructions
-Meant to be a companion read for longitudinal design of OaR Uncut.
-Provides a comprehensive set of reasonable rules and regulations. How closely you adhere to this will determine how similar your maps will be to HL OaR. Given the flaws of this chapter, departures are not necessarily a bad thing.
-Most suggestions are painted in broad strokes to grant a good degree of design flexibility.
-Read often during development of your sections. In theory, it should be useful THROUGHOUT the design process. Some ideas will be scrapped due to constraints or the emergence of better ideas while others may become useful/feasible later on down the line.
-[COLOR=‘Yellow’]Yellow=suggestions/comments; [COLOR=‘Red’]Red=things that need to be in the remake (iconic reasons)

Content quantity and map placement
The advantage of interspersing multiple maps WITHIN BMS OaR is that it allows you to keep pervasive features of HL OaR that are critical to maintaining the feel of the chapter (e.g. rail switching, tripmine traps) and distribute them in such a way that they become reinforced design elements. In addition, it better captures the pacing of the original game and helps retain its chronology. It will also make stylistic differences between you and the devs less apparent and creates a better ebb and flow to the chapter. Your scripted sequences and attention to detail are far better than most of the BMS team and this chapter could really benefit from that type of flair as the alien and HECU encounters are kind of meh. There are many HECU vs alien combos that aren’t seen in HL but would be interesting to implement.

[COLOR=‘Yellow’]If 3 maps are used, they MUST (not should) be implemented as follows: one before and two after BMS C2A2B. Rationale:

  1. All of the major cuts to HL OaR appear before and after BMS C2A2B, with the latter section being cut the most (hence requiring a second map). Arranging the maps in any other way will create serious and unacceptable anachronisms in the sequence of events. Once you compare HL OaR to BMS OaR, you’ll see that this is the ONLY solution.
  2. There’s a distinct theme shift in HL OaR design from that of an office complex to a materials transport system w/the split occurring half-way between the chapter. This split is seen by the .50 cal in BMS C2A2B but the themes are severely underdeveloped. As HL C2A2B1 and C2A2C (the office complex), are relatively small maps, you might be able to replicate them w/in a single Source map. However, the area from mid-C2A2D to C2A2G will require 2 maps. This will also give you significant creative freedom to develop the materials transport section, as it was not fully realized in HL.

Some thoughts on introducing a 4th map

  1. This map is good for decreasing content density. Once you release your work for beta testing, the BMS community has an obnoxious tendency to want more, more, more (more houndeyes, headcrabs, scripting, ammo, health etc) when less is oftentimes more and better for gameplay. With 3 maps, this could be problematic…4 maps will allow you to add more features w/o cramming.
  2. The 4th map would ideally be placed before BMS C2A2B but could also be placed before C2A2A. In the former position, you could develop the office complex theme even further by improving its already impressive architecture and expanding either vertically to increase the sense of scale or horizontally to increase the journey element of tram travel. In addition, there are more opportunities to add cool scripts as the HECU are busy fighting aliens at this time. Placement of the 4th section before C2A2A offers the advantage of introducing the claw puzzle and the rail switching mechanic early on (though the switch in HL C2A2B1 works very well) but there are several disadvantages, namely 1) awkward transition from Power Up to OaR (the descent sequence and Joel Nielsen’s track are TAILORED for this) 2) boring encounters…only xenofauna would be seen in this section 3) poorly defined theme and player unfamiliarity. The only map that could reasonably be put in before C2A2A is C2A2B2. Since you can’t replicate the rocket scene (see below), that leaves only the deployable bridge, some water and a broken elevator, which aren’t exactly memorable features. You could perhaps theme the area as a hybrid between Power Up and C2A2B2 but the player would not be able to associate this section w/a HL section, which kind of defeats the purpose of a remake. I think the excess creativity that comes w/designing this section is rather detrimental and your efforts would be better directed to further developing the office complex.

Backstory
Military’s relationship w/aliens
The HECU are LOSING the war with the Xenians DURING the time of OaR. This is in direct contrast to what some forum members have been saying about the HECU being in control during this chapter and only losing toward the end of ST. A playthrough of HL OaR will reveal that ~40% of the HECU have already been eaten by bullsquids, there’s a soldier trapped by xenofauna in C2A2B2 and a pair of soldiers hiding from the vorts in C2A2E. Thus, the presence of sentry turrets is probably not a show of military strength but rather a necessity from the lack of manpower. The same could be said w/all of the defensive emplacements. Why would they turtle if they were in control? You don’t get this sense of loss of control at all in BMS OaR, which I think is a mistake that should be fixed.

Rail system
The OaR rail system is one of the oldest areas of BMS, functioning both as an office complex (1st half) and a materials transport system (2nd half) and these roles make perfect sense. The rail system is massive and it would be easy for BM crew to get lost, hence office complex areas were erected over the system, both for easy navigation (e.g. maps in the offices) and to maximize workspace. The materials transport system is self explanatory. In BMS OaR, both thematic elements appear in C2A2B but are significantly toned down…the office complex is a tiny 1-story area, though it actually spanned at least 3 maps in HL over two floors. The materials transport system in BMS is pitifully noted only by a decal…materials transport areas B and A are missing entirely.
[COLOR=‘Yellow’]
Some suggestions for OaR Extended based on these observations:
-It’s obvious that the military hates Freeman so this theme doesn’t need reinforcing…it’s really ridiculous to think that all of the traps/emplacements are solely meant for him. The HECU’s focus needs to be placed more on the world rather than Gordon, which makes it more realistic that a physicist could survive such a situation (already unrealistic). Thus, what needs to be reinforced MORE are the following: 1) military struggling with hostile aliens…they don’t always have to lose but they need to be PREOCCUPIED. This lends itself to some very cool scripted sequences using all sorts of xenofauna. 2) military intercepting scientists/security trying to escape the rail system. This can be shown through live executions, HECU engaging security guards and/or lots of scientist corpses in the office complex.
-There needs to be a second HECU vs vort battle (like in HL OaR) but the vorts need to WIN, as the HECU already win DECISIVELY in BMS C2A2B.
-Expansion of the office complex area BEFORE BMS C2A2B and expansion of the materials transport system AFTER BMS C2A2B.

HL OaR reference map
Note: the dev appears to recognize the important design elements and features of OaR but many of these were excluded in the final release for w/e reason; the original plan was much more ambitious.

BMS OaR reference map
Note: this map was made some time before the release and may be slightly inaccurate.

Map equivalence
BMS C2A2A = HL C2A2A (in spirit)
BMS C2A2B = HL C2A2D (1st half)
BMS C2A2C = HL C2A2G (2nd half minus quiet area) + C2A2H

Visualizing the maps
The configuration of HL OaR is basically that of an upwardly spiraling corkscrew centered around the rocket, w/the base representing C2A2B2, the middle representing C2A2D and the top representing C2A2H.
For BMS OaR, visualize a vertical line, w/the top of the line arcing back on itself to form the letter “P.” The intersection of the line on itself represents the rocket at C2A2B. In actuality, the arc of the line terminates at a higher parallel plane than the vertical segment of the line (i.e. they don’t intersect), w/the termination point representing the rocket at C2A2C. Notice that the path in BMS OaR is inherently more linear. Keep this in mind when designing the new sections.
For a comprehensive video playthrough of both HL and BMS OaR complete w/image library, see jessiestorm88’s posts on page 10: https://forums.blackmesasource.com/showthread.php?t=15754&page=10.

Major weakness of HL OaR w/commentary
C2A2B2 is an extraneous element…the map is meant to orient the player to his objective by showcasing the rocket base, but its placement in HL OaR makes it easily missed.
[COLOR=‘Yellow’]-The absence of this map in BMS is good because it creates a more linear, rather than spiral path of travel. The design of the map was rather uninspired anyway.
The double loop of C2A2A is frustratingly designed and confusing for players.
[COLOR=‘Yellow’]-This is really the only problematic rail element of OaR, as everything else is fairly linear. The loop in C2A2F is tastefully done w/a single switch and most of the other rail elements can be retained in the remake to preserve the feel of the original.
The materials transport theme is incompletely realized. The theme manifests in C2A2F but disappears at the beginning of C2A2G, even though there’s a sign designating it as a transport area (seen at the end of C2A2F).
[COLOR=‘Yellow’]-You’ll have lots of freedom to further develop this when remaking C2A2G.
OaR is too long and boring.
[COLOR=‘Yellow’]-Unfortunately the devs took this complaint literally and cut out way too much in the redesign. The original OaR added diversity to chapter lengths…it was only boring because of the CONTENT QUALITY, not its duration. This is what the dev failed to pick up on (think ST, which is even longer and more exciting).

Areas and features EXCLUDED from BMS OaR (comprehensive list; map nomenclature based on HL Source OaR)
[COLOR=‘Yellow’]General tip: after you select which scenes below you want to use for OaR Extended, try to add them roughly in the order that I outlined as everything is in chronologic order. You’ll be able to better retain the flavor of the original OaR by doing so.

C2A1 (basically the end of Power Up)
Nothing

C2A2 (transition leading to OaR proper)
Nothing

C2A2A
-Giant loop area consists of two switches.
[COLOR=‘Red’]-A bullsquid and a pair of houndeyes guard the base of the claw which obstructs the entrance to C2A2B1. The upper area you need to access to move the claw is visible here.
-Traversing the loop will lead to two areas each w/some dead marines and a bullsquid.
[COLOR=‘Red’]-The upper area you need to access to move the claw (located by one of the bullsquids) is also guarded by a headcrab and sentry turret.
[COLOR=‘Yellow’]Keep the association of bullsquids w/dead HECU, which is reinforced EVERYWHERE in this section. This is important for storytelling.
The main gameplay element to retain is the claw obstructing the C2A2B1 entrance, which is iconic because it’s the first “puzzle” of OaR. This is obliquely replaced by the power puzzle in BMS C2A2A in the sense that it’s a barrier to progress. However, the claw is a frequently occurring aesthetic element of HL OaR, often appearing either by itself or holding a rocket engine.

C2A2B2 (side exploration area w/no functional purpose; only connects to C2A2A)
-Main chamber consists of a bullsquid eating some dead marines.
-Within the silo door, there is a trapped marine by the rocket base fighting w/several headcrabs.
-A small pack of houndeyes guards the stairs. Following the area up the stairs will lead to a water area w/a deployable bridge. The end of this area consists of a busted elevator w/explosive pickups and bullsquid eating some dead HECU.
[COLOR=‘Yellow’]The marine/headcrab scene CANNOT be replicated exactly because the rocket base seen in BMS C2A2B does not extend to a floor below but is instead positioned atop a lift. Hence, the base would not be visible to the player. There’s really only 2 ways to keep this scene: 1) Replicate it in SPIRIT…the marine could be alone in a room when several headcrabs burst from the ceiling. 2) Replicate it CLOSELY…instead of the main rocket, you could simply create a room containing a partial rocket or engine.
The deployable walkway and busted elevator would fit pretty well in the office complex section of OaR Extended. The walkways could connect different buildings for instance. The deployable bridge has been replicated in spirit for the power puzzle in BMS C2A2A but the use of it as a WALKWAY, which is how it’s done in HL, has not.

[COLOR=‘Red’]C2A2B1
-Tram lift area w/3 marines, one of which is on an elevator (same as BMS C2A2A except marines have been swapped w/sentries).
-At the top of the elevator area, there is an MP5 grenade marine standing on a wooden platform. He can be crushed by your tram.
-Rail switching element either places you closer to the .50 cal side or the vort side (irrelevant for progress as the tracks converge). Both sides have a toll gate and a switch. Each switch affects both gates and following either path will lead you to C2A2C.
-The upstairs area by the vort side has a battery charger guarded by a pair of headcrabs and a marine (if he was not killed already).
-The upstairs area of the .50 cal side also connects C2A2B1 to C2A2C.
[COLOR=‘Yellow’]Both C2A2B1 and C2A2C are intimately connected and have been CUT from BMS OaR. These areas are iconic, pretty well designed and quite complex so you should follow their layout closely. Specifically, the important elements are as follows: 1) Extended office complex theme w/storage area. Note that the complex is massive and covers 2 stories, w/interconnecting areas above the tracks. You may be able to replicate this area faithfully w/one map but w/two maps, you could extend the complex even more VERTICALLY, which will give you the creative freedom to add new features. 2) PARALLEL tracks that CONVERGE. This is the only time this design is seen in HL OaR, which makes this area unique and memorable (especially w/the long vent and .50 cal). Parallel tracks are a great addition because they allow you to place a TOW launcher marine BMS-style (e.g. destroys the tram, player hops on new tram on the opposite track). Convergent tracks are great because they DON’T require backtracking.
While the marines guarding the tram lift are kept in spirit as sentries in BMS C2A2A, having actual marines shooting at you while you’re both on a lift would be a nice feature since they are mobile. There’s lots of places to potentially put this sequence.
The instance where the marine is run over by the tram is very unique as it may be the only time in HL where you can actually do this. If this feature can be incorporated in your redesign, it should.
Another HECU vs vort battle needs to be included in your redesign for storytelling purposes…only this time the vorts WIN.
The underground element in C2A2C is very rewarding when discovered and should be retained because it is the closest thing to a vent crawl sequence in the entire chapter. It also encourages exploration and allows the player to watch some cool scripts safely.

[COLOR=‘Red’]C2A2C
-The shared upstairs area in C2A2B1 and C2A2C is themed as an office complex/storage area.
-The lower floor has a tripmine trap above the rails.
-A destructible vent underneath the stairwell leads to a hidden area beneath the 1st floor w/several pickups and a headcrab. The player can observe the 1st floor battle by looking up through the grates.
-A massive HECU vs vort battle takes place here (spirit of this battle is captured in BMS C2A2B ).

C2A2D
-“Surrender Freeman” decal by the fortified bunker.
-Tripmine trap over the rail (useless placement as it terminates in a dead end that the player does not explore).
-The entrance to the rocket is guarded by a pair of tripmines.
-Player enters a corridor w/a pair of bullsquids and 3 laser triggered sentries. The sentries will target the bullsquids first giving you a chance to kill them.
-There is an explorable side room w/the decal “Yore dead Freeman” and 3 dead HECU. It’s guarded by a barnacle, bullsquid and headcrab.
[COLOR=‘Yellow’]The sentries and bullsquid scene is actually pretty cool though the corridor itself is rather uninspired. Might be better to preserve this in spirit (xenofauna used as fodder to provide you w/time to address the sentries).
The story element of the side room should be preserved…the room itself does not need to be.

[COLOR=‘Red’]C2A2E (BMS OaR deleted the section from here to mid C2A2G)
-Contains the greatest amount non-circular travel in all of OaR.
-TOW launcher marine.
-2 tripmine traps.
-Tram stops at a toll gate where a huge vortigaunt ambush (4 vorts + 2 in the corridor) takes place.
-The upstairs area is guarded by a pair of tripmines and a pair of marines. It contains a switch to lift 2 toll gates (the one obstructing your tram and one on a parallel track, which is visible from this area).
-Should you backtrack to retrieve your tram, you will trigger a script where a marine takes the tram on the parallel track. By commandeering this tram, you will take the correct path.
-If you do not commandeer the tram, you will wind up at a dead end and a marine will set off a dynamite trap.
-At the next toll gate, a massive ambush of HECU (4 marines+.50 cal) awaits. Need to flip the switch in the storage area to lift the toll gate.
-Tram lift at the end plus elevator for players leading to an explosive crate trap (need to use a satchel here).
-Electrical malfunction area where player has to dodge the electricity.
-Tripmine trap.
[COLOR=‘Yellow’]While the exact layout of C2A2E does not need to be replicated, the sense of travel associated w/a noncircular path should be there, especially since the player is nearing the end of the chapter. The brain tends to reset after each battle/puzzle that takes place away from the tram, which negates the sense of travel via the rail system. In HL, this problem was addressed by having long segments where the player stays on the tram. A good way to alleviate any potential boredom w/this design philosophy is to add lots of eye candy during the travel (think Inbound, endgame citadel sequence in HL2), perhaps on a parallel but inaccessible track. This could include 1) aliens doing their thing, such as houndeyes napping, vorts exploring 2) HECU doing their thing such as setting tripmines or using the radio 3) HECU/alien engagements…you could have a marine on a moving tram attack a houndeye pack that’s in hot pursuit or have a defensive marine emplacement gun down Xenians/scientists. These would be good for storytelling.
The vortigaunt ambush and the marines hiding behind tripmines needs to be in your remake as it’s a critical story element.
It seems like dynamite is only ever seen in HL OaR. The marine setting off the trap is located in an explorable side area that’s very easy to miss but once you find him, his actions are extremely memorable. Here’s some cool things to do w/this scene: 1) place the scene in an area the player MUST traverse…it’s too cool to miss. 2) some cinematic physics, shaking effects and sound effects would be spectacular here. 3) the damage caused by the explosion could lead to a secret area w/an ammo health/stash or (more preferably) allow the player to gain access to another segment of the rail system that EITHER functions as a mandatory path OR an alternative path to get to C2A2F (think ctf_2fort on TF classic and BMS ST, where a houndeye leads you to a secret area).
The ability to commandeer a tram from a soldier is a very memorable feature and should be retained. It is only kept in spirit in BMS C2A2C, where you kill a pair of marines but cannot access their tram. See the C2A2E redesign schematic (image 9) for a way to keep both the dynamite and the tram sequence w/o using the original HL map layout.
The massive ambush of HECU in the storage area is an iconic part of HL OaR and needs to be included.
In HL, the explosive crate trap serves no other purpose other than to test out a satchel. Basically, you just drop the satchel, go down on the elevator and detonate, which is pretty mundane. You can really spice this up by scripting a HOUNDEYE to run toward you and the explosive crates. He will charge up his attack (ultimately killing himself) and force the player to think fast and take the elevator down, similar to the satpipe scene.

C2A2F
[COLOR=‘Red’]-Themed as materials transport area w/moving crates. The toll gate is guarded by 2 marines who reveal themselves after shooting through crates.
-The upper transport area is guarded by 2 laser sentries.
-TOW launcher marine.
-High voltage area w/electricity obstacles over the rail.
-All of the above areas form a loop. Hitting the rail switch area breaks the loop. The track system terminates at “Sector E Mat. Trans. B” and you climb down a ladder to get to C2A2G.
[COLOR=‘Yellow’]The materials transport theme really needs to be reiterated in your redesign. The Residue Processing-like area in C2A2F w/moving crates is one of the most iconic sections of HL OaR but is completely missing in BMS.
While shooting through destructible crates is a little silly, the spirit of the ambush could be preserved by having the marines pop up from behind the crates or come in from a side room.
Malfunctioning high voltage areas are a pervasive theme of HL OaR and should be applied fairly liberally throughout your remake as obstacles to both tram travel and walking.
The loop here is very tastefully done because there’s only one switch element, which keeps it easy and minimizes frustration. It could potentially be retained to create a sense of scale.

[COLOR=‘Red’]C2A2G

  • The ladder takes you to “Sector E Mat. Trans. A.” At the base of the ladder, there is a laser trigger for the 4 sentries in the main room. There are 3 tripmines preventing access in the main room. A smaller room, which you can use for cover has two zombies and some grenades for the turrets.
    -The quiet outdoor area has 2 marines having their iconic conversation as well as a sniper (the quiet area and sniper are missing in BMS).
    [COLOR=‘Yellow’]The sentry trap and zombie room are iconic parts of OaR (not to mention pretty fun) and should be retained. This trap could be ported upward on another floor to free up the vertical space in the main room for use in extending the material transport theme.
    Unfortunately in BMS, the conversing marine scene has been merged w/the HL C2A2H battle by the silo, which cuts out the quiet outdoor area and sniper. I thought this area was really important because it was the first time the player could actually enjoy the outside in peace and appreciate the skybox (WGH doesn’t count because you have to run like hell). The sniper is also the very first sniper you encounter in game, so if you decide to re-add him, make sure to place hand grenades or MP5 grenades in a very obvious location. Note that making these changes would likely require an edit to BMS C2A2C or a radical revision of your take on HL C2A2G and late C2A2F (e.g. addition of an outdoor area).

C2A2H
Nothing. Deletion of the dynamite trap was a smart move by the dev (but the absence of the awesome post-launch music is sorely missed).


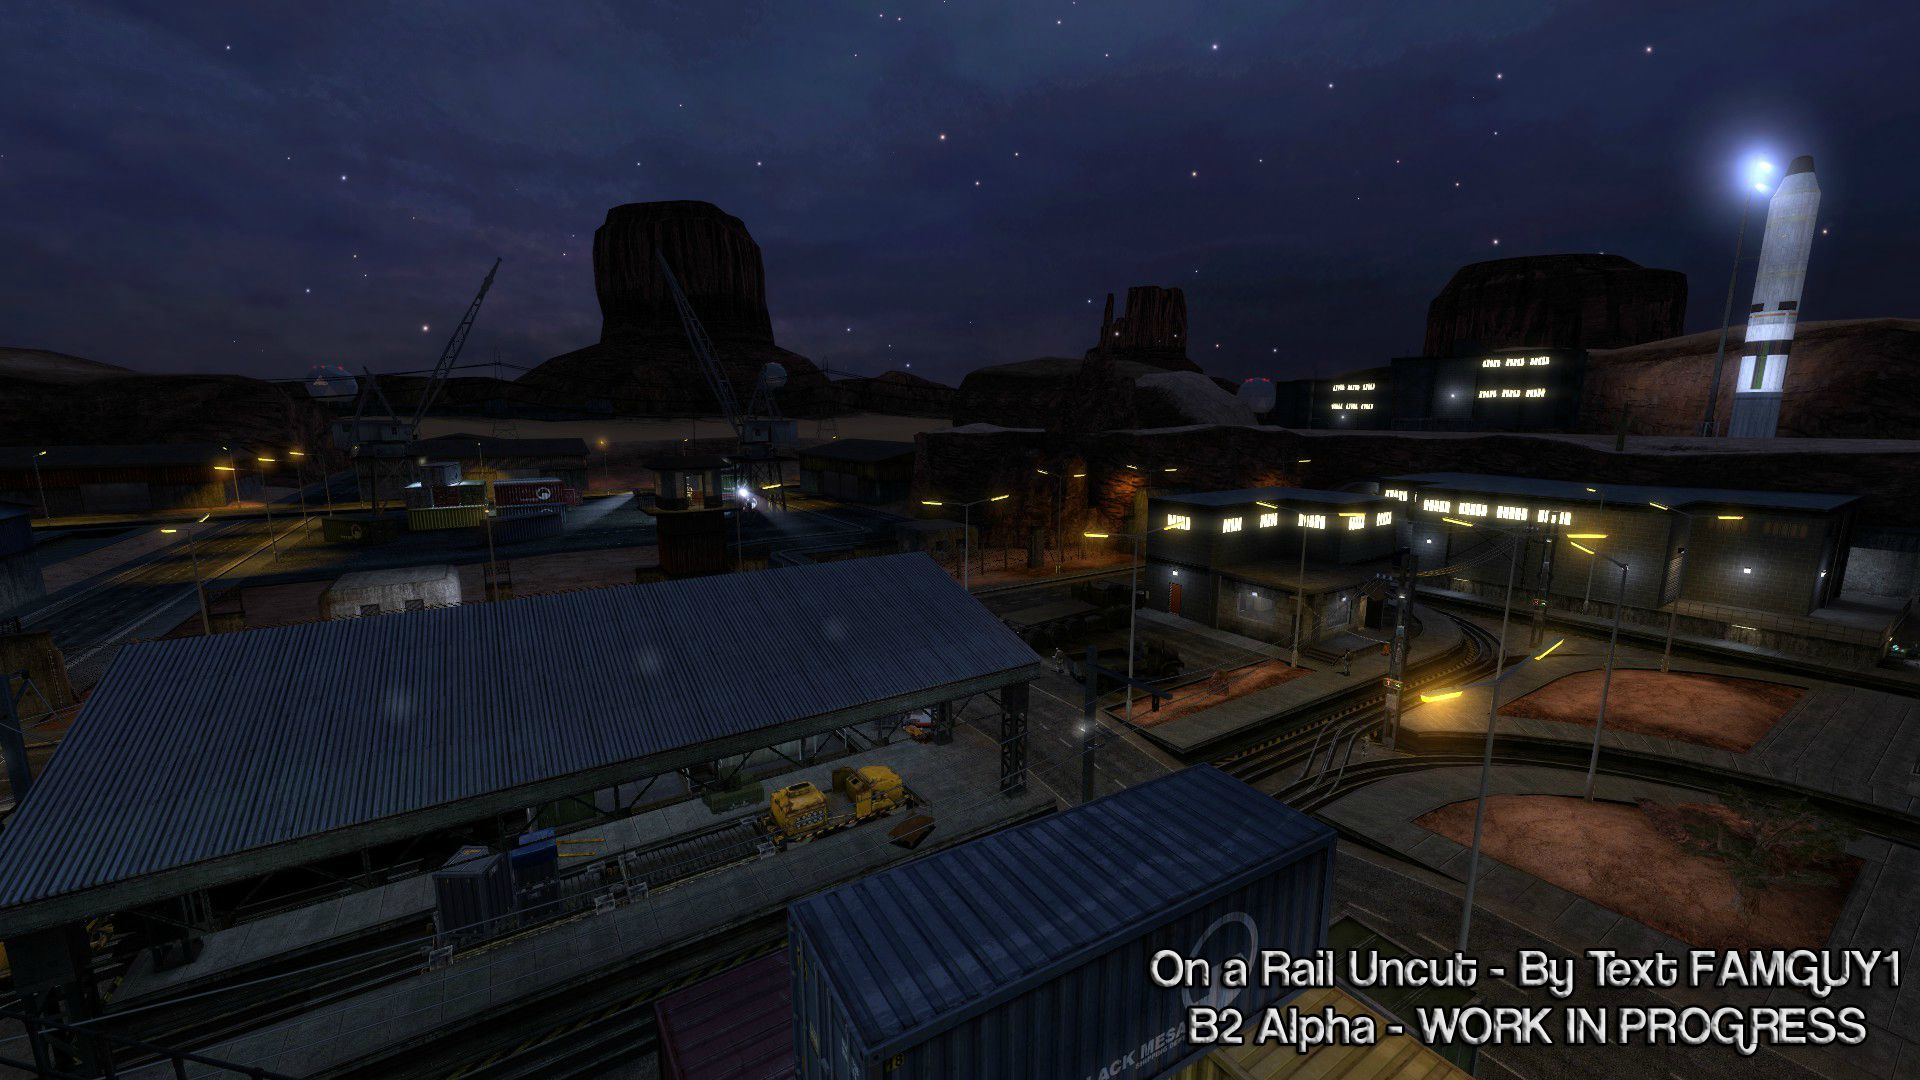
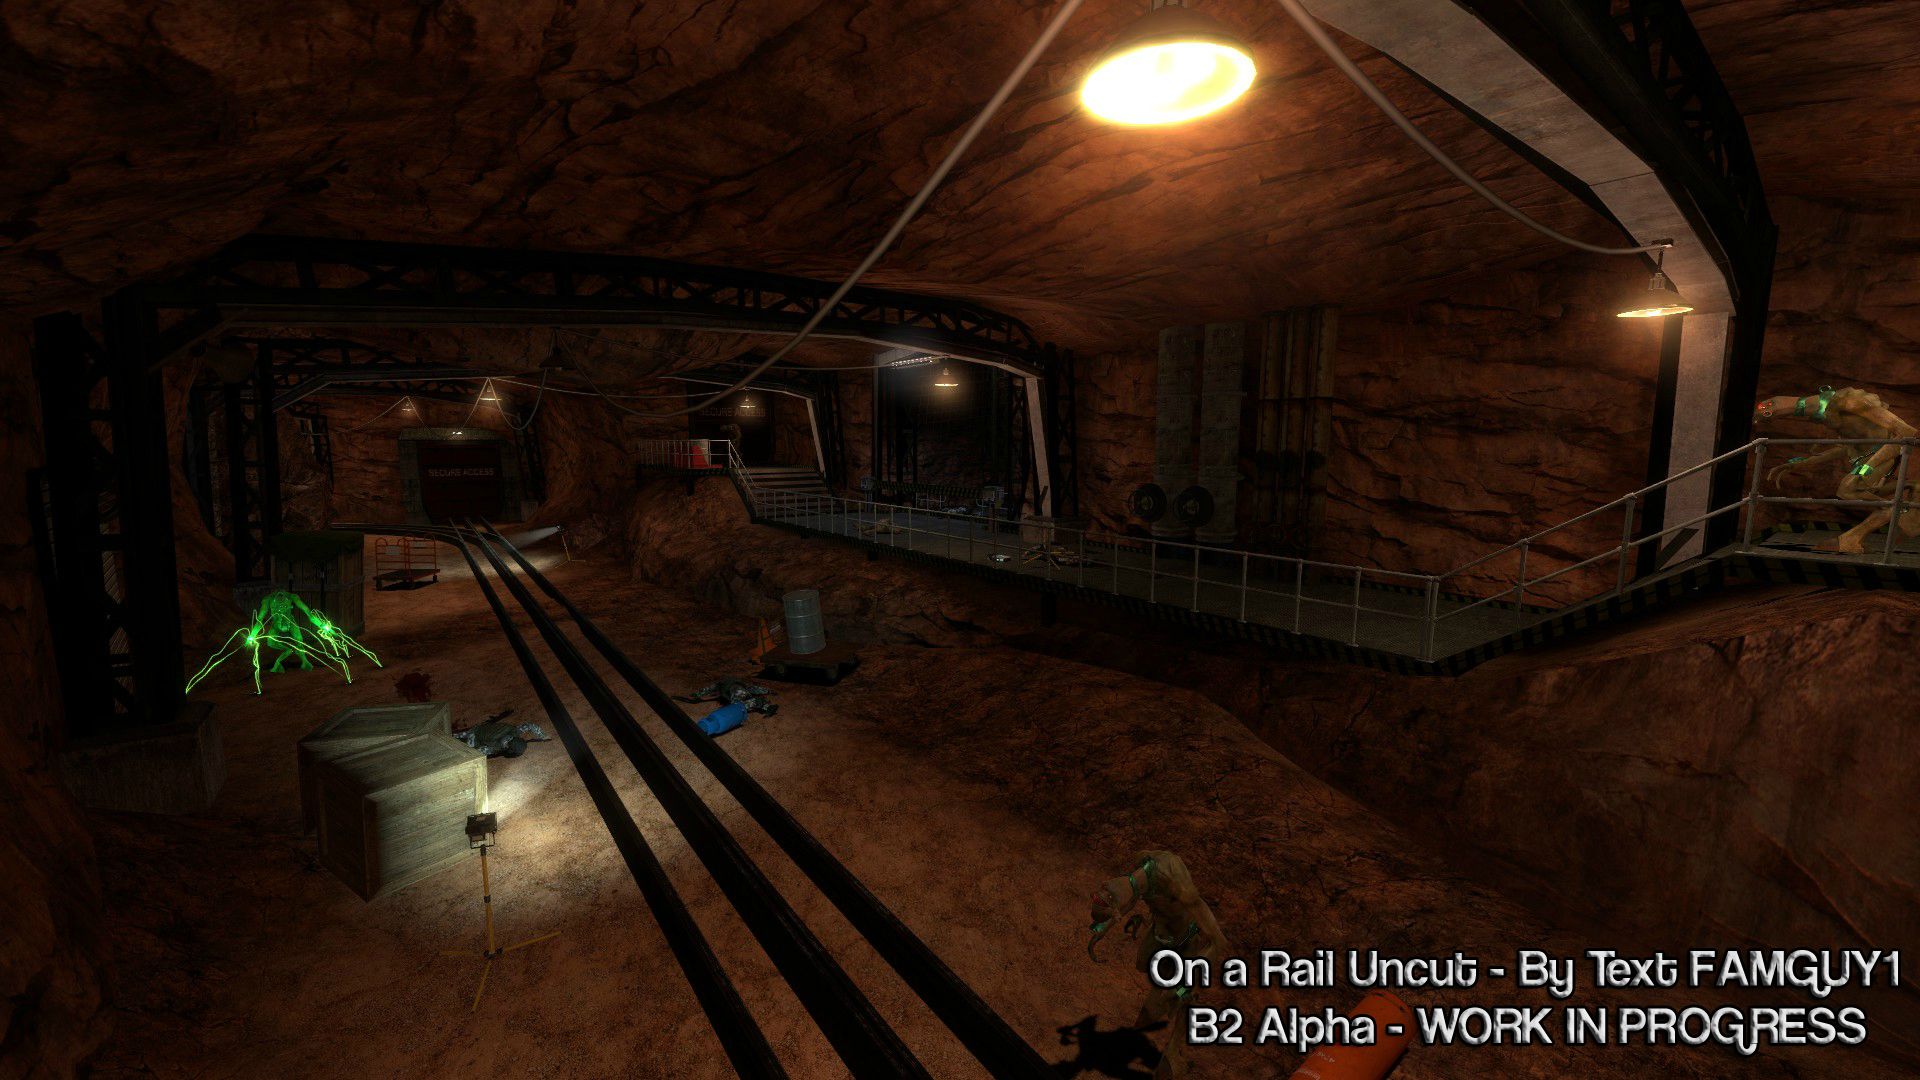
Pitch Bible for OaR Uncut (Part 2)[/SIZE]
Pervasive elements of HL OaR (general themes)
[COLOR=‘Red’]-HUGE number of bullsquid encounters…they are found in ~2/3 of OaR and are always munching on dead marines.
-4 way junctions, both cosmetic and functional, as well as unusual branching patterns to emphasize the scale of the rail system.
-Many instances of rail switching and toll gates (red/white barriers over the rails that prevent tram movement until lifted).
-NUMEROUS tripmine and sentry turret traps, both on the rail system and in buildings.
-NUMEROUS .50 cal emplacements; 2 TOW launchers encountered in C2A2E and C2A2F.
-Office complex theme early on, materials transport theme later.
-Electrical malfunction areas that serve as obstacles.
-NO vent crawl sequence in the entire map. There are only a few instances in which vents are even seen.
-An army radio is almost always near the HECU encounters.
-MP5 grenade throwing marines scattered throughout the chapter.
-Loop design, both in C2A2A (two switches) and C2A2F (one switch).

[COLOR=‘Yellow’]Suggestions based on these elements
-In general, the use of all of the aforementioned elements will help your sections retain the HL feel.
-Always remember cause and effect. If the player flips a switch, he should SEE the effects of the switch. This helps prevent frustration.
-The association of bullsquids w/dead marines should be kept as it’s an important story element. However, HL OaR has an unrealistic number of dead marines w/individual bullsquids so this needs to be toned down.
-Houndeyes are an underutilized element in HL OaR and critically underused in BMS OaR (only one encounter). There’s lots of fun things to do w/them.
-Headcrabs are also underutilized in BMS OaR compared to HL OaR.
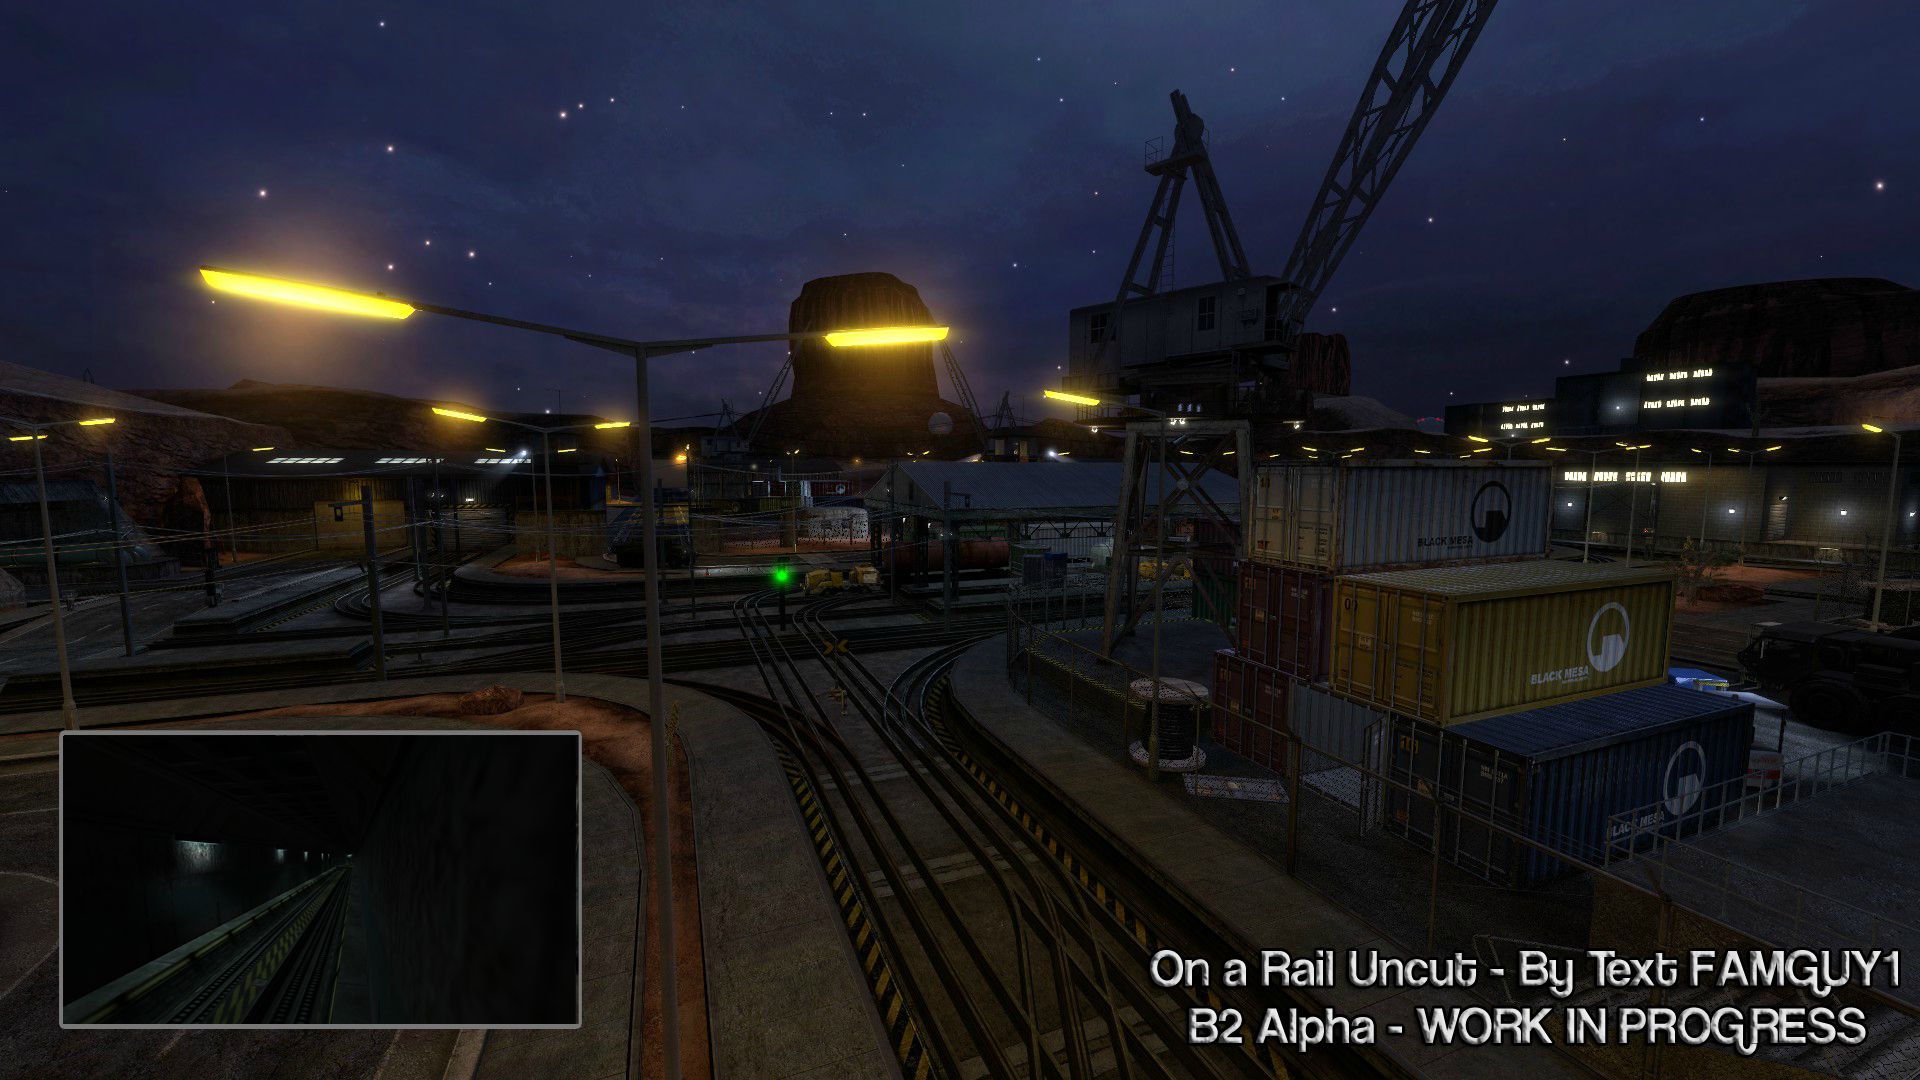
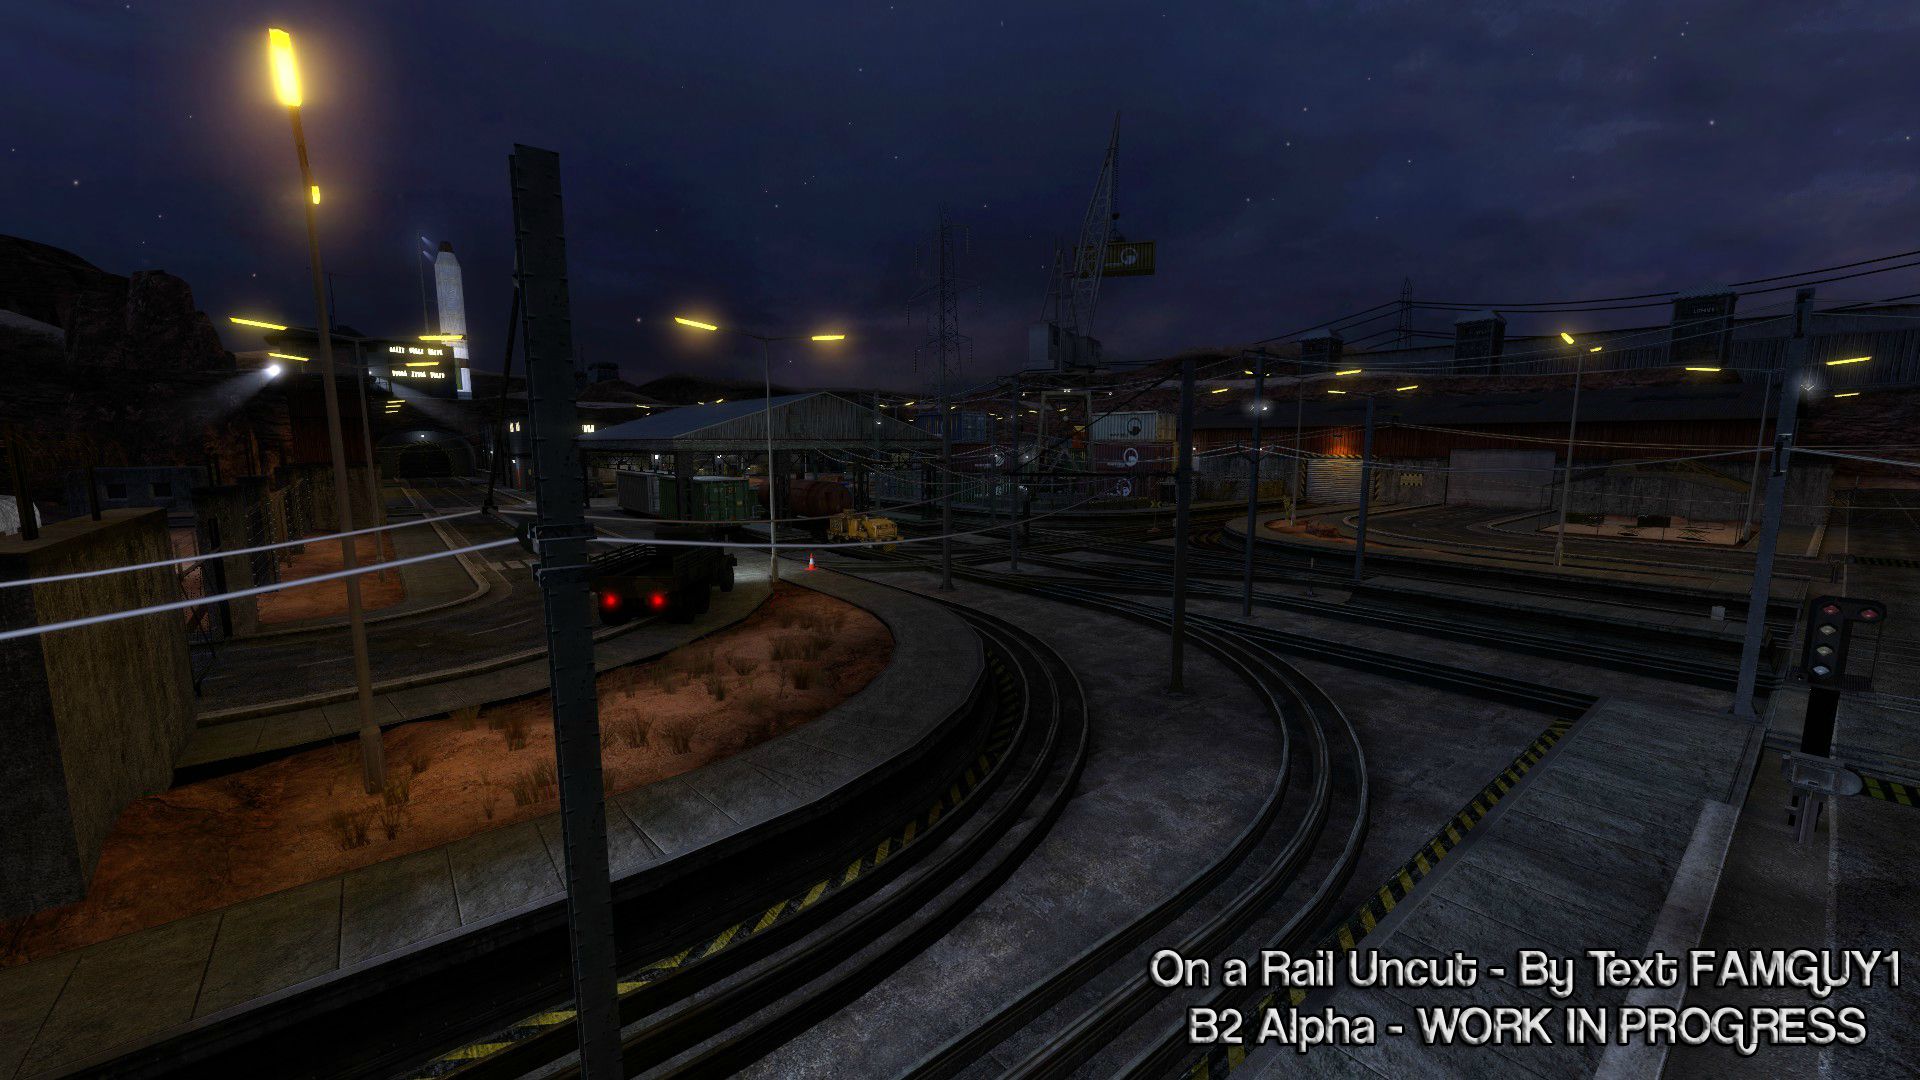
-In HL, the rail system was massive and this effect is SORELY lacking in BMS OaR. This is really the biggest piece of GENERAL advice I can give for your sections…recreate that sense of scale. Here’s some tips: 1) 4-way junctions add to scale and can be used aesthetically or functionally. If using them functionally, one end should terminate in an inaccessible silo door. This essentially creates a 2-way junction which minimizes backtracking. 2) Increase the vertical space of your maps SIGNIFICANTLY. This is taking a page from Minerva/late-game Portal. For instance, the office complex could be made to be 5-6 stories high, w/each floor showcasing a different feature/script. The same thing could be done for the materials transport area. This reinforces the massive size and underground nature of the rail system and allows you to EFFICIENTLY condense 5-6 maps worth of features into fewer maps. 3) As the player travels along the rail system, you could have him see tracks going perpendicular above and or below him. A script w/a marine shooting the player while on a moving tram could visually direct the player to interesting features.
-Rail switching can be accomplished easily w/a control panel placed on the sidewalk area of the rail. Ideally, you’ll also go back and decompile the BMS OaR maps and add these panels (destroyed ones) at every switch point. It makes no sense why the rails would switch in your sections and not the dev sections.
-Tripmine traps are abundant and can be placed anywhere. Just make sure the detonation hurts the player if they’re on the tram.
-Fun sentry turret traps can be found in C2A2D (Xenians as fodder while you kill the sentries) and C2A2G (iconic section which should be retained).
-Electrical malfunction areas can be made plentiful.
-Loop designs actually aren’t that bad (see C2A2F) and help reinforce the sense of scale. They are very easy to figure out when only 1 switch point is added.
-The BMS TOW launcher is kind of lame as the HECU could realistically only fire one shot. A good place to put the missing launcher is in an area w/parallel tracks. To keep consistency w/BMS, the shot should destroy the tram. After the player dispatches the marine manning the launcher, he uses the intact tram on the other track to continue his journey.
-Avoid using vent crawl sequences but keep the aesthetic vent in C2A2B1, as it contributes to the area’s iconic design.
-You can use some the HECU radios to convey story elements, assuming you can find some useful scrapped lines.

Ammo theme
Common ammo pickups in OaR include magnum, shotgun, MP5 grenade and satchel.
Glock/MP5 primary ammo does NOT need to be given as it’s obtained from the HECU.
Grenades are ONLY given near sentry turret traps.
Tripmines are fairly rare.
[COLOR=‘Yellow’]I’d suggest keeping this theme w/the exception that you add more tripmines, especially the map after C2A2B (to prep for the outside battle). BMS HECU are no fun to fight against in groups and trapping techniques are extremely useful to prevent excess damage.
OaR is the first chapter that introduces the satchel charge (generally in hidden areas) and the first one can be found at the end of C2A2B2. However, this weapon never gets the introduction that it deserves as the explosive crates by the C2A2F elevator come far too late in the game. An easy way to correct this is to replicate the gameplay from ST_uncut TOW courtyard…you can have a massive amount of enemies (e.g. 6-8 houndeyes, 6 marines) come through a small corridor but give the players some sort of hint to cue their arrival (e.g. a video camera). This FORCES the player to prepare a trap using satchels as well as tripmines, instead of making these weapons optional (and generally underused).
All health/power dispensers in BMS OaR give 50/75 except the last one in the launch room. You can add more variety here (e.g. 50/50, 50/25) and correct any deficits w/health and battery pickups.

Enemy theme
The enemies prior to C2A2B1 consist exclusively of xenofauna (lone marine in C2A2B2 is the exception).
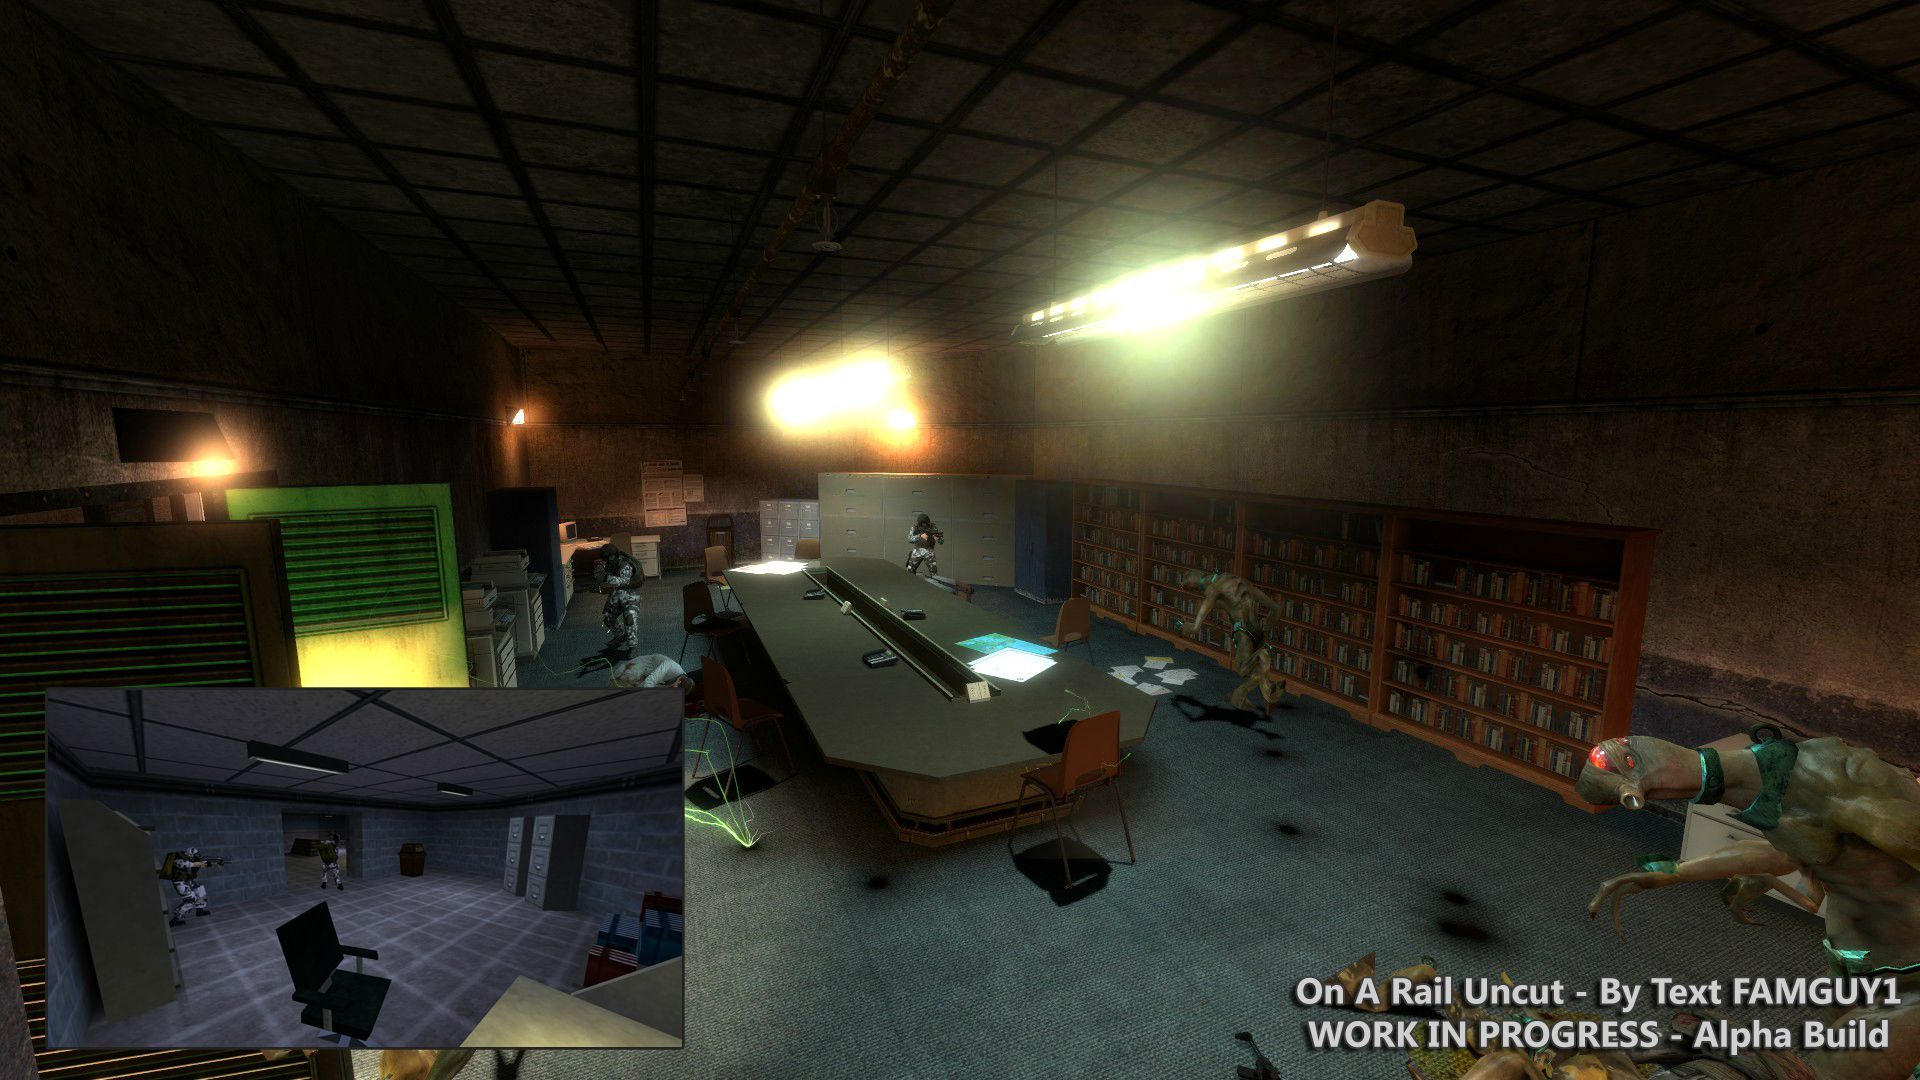
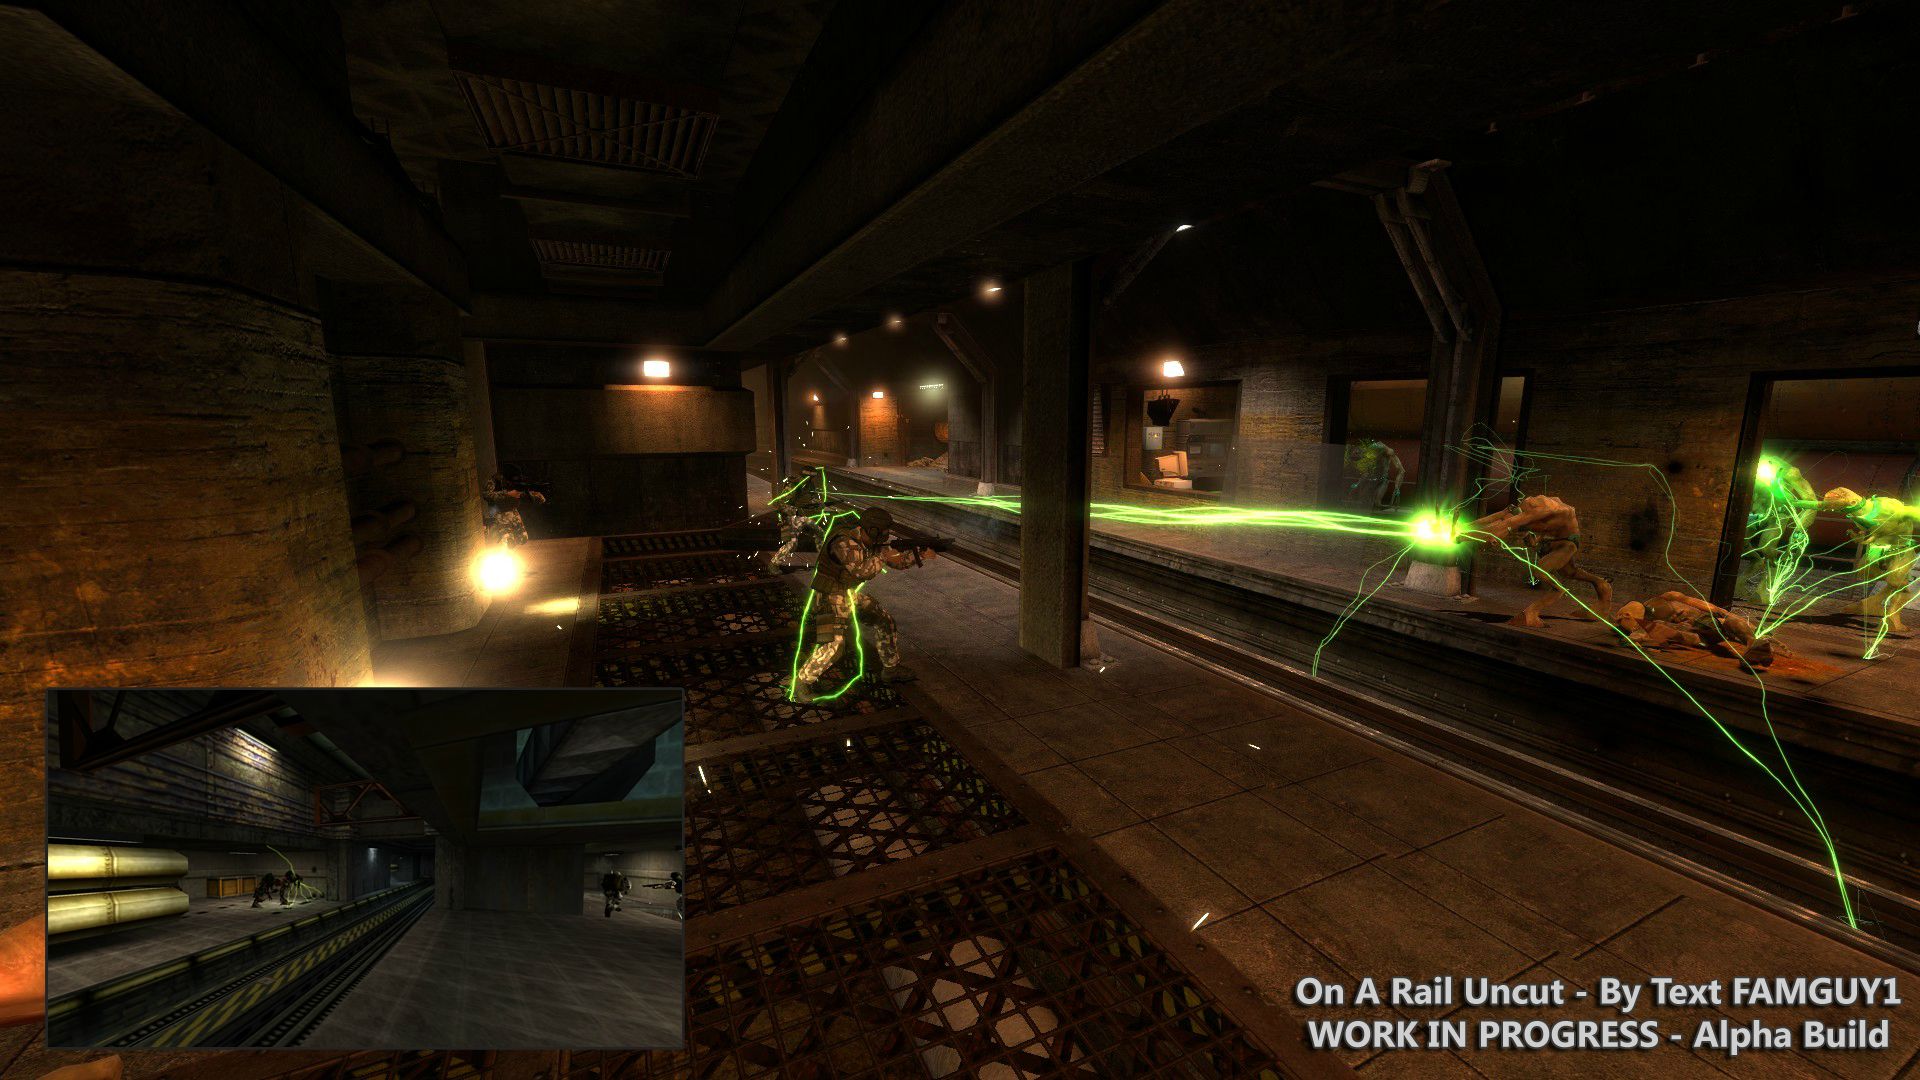
Diversity is found from C2A2B1 to mid-C2A2E, where the player encounter marines fighting vorts, marines alone, vorts alone, sentry traps and a smattering of xenofauna.
All enemies from mid-C2A2E to C2A2H consist of HECU and their traps (the 2 zombies in C2A2G are the exception). The TOW launcher marines are located in C2A2E and C2A2F.
Only vorts teleport into OaR; the xenofauna appears to have been there for some time, which creates a sense of chronology in the Black Mesa incident (i.e. xenofauna first, then slaves, then alien military proper).
The HECU are ONLY seen engaging w/vorts. All other battles w/xenofauna are inferred, as the HECU’s presence is only shown by corpses (lone marine in C2A2B2 is the exception).
[COLOR=‘Yellow’]The general theme of xenofauna at the beginning, diversity in the middle and HECU at the end should be retained to keep the feel of HL OaR.
There can be a few exceptions made to the “no xenofauna teleporting in rule” to surprise players. This is used somewhat inconsistently in BMS but is nonetheless a pervasive theme.
The HECU can and SHOULD engage w/xenofauna. This will spice up the chapter considerably. Realistically, the number of HECU victories should be few in the beginning and more toward the end since they are stationed by the launch site but for gameplay diversity (which is more important), it’s better to have the victories alternate.

[COLOR=‘Yellow’]Important decals to make
“Surrender Freeman” in blood
“Sector E Mat. Trans. B”
“Sector E Mat. Trans. A”

[COLOR=‘Yellow’]Potentially interesting AI battle scripts
Barnacle
-Barnacle eats a marine. If scripted, the marine could be animated to struggle while being pulled up. If unscripted, an area could be designed such that an astute player could lead the marine into a barnacle trap (think narrow corridor). You could actually do this in BMS WGH.
-Marines on a tram carrying military supplies stop their tram and start shooting at a large group of barnacles obstructing the track.

Headcrabs (underused in BMS OaR)
-Headcrabs attack trapped marine, similar or identical to C2A2B2 scene.
-Headcrab actually kills an un-helmeted marine by latching onto it’s head.

Bullsquid (tend to be solitary, no more than groups of 2)
-A pair of bullsquids fight and kill off a cornered soldier. They actually never fight the HECU in HL OaR, which is weird since they always eat them.
-A ceiling drop sequence into a room with bullsquids. One of the bullsquids gets startled and jumps…both of them charge at you instead of using acid spit. This idea helps account for some of their missing animations in BMS as well as AI deficits. They are called BULLsquids for a reason and should preferentially use charge over acid spit, as they do in HL. The acidlion AI leaves MUCH to be desired.
-While lowering a walkway segment, the player sees a soldier being pursued by a bullsquid. The soldier jumps onto a walkway segment and then proceeds to run toward/shoot the player. As the bullsquid had to stop abruptly, it reverts back to its acid spit attack.
-A bullsquid chases a soldier on a moving tram but eventually slows down and gives up (think lion chasing an antelope).

Houndeye (criminally underused in BMS OaR)
-Houndeye detonates explosive crate trap in C2A2E (see above)
-A pack of houndeyes teleports in but one slightly misspawns, being partially trapped behind some boxes. The houndeye uses its attack to clear the boxes, showcasing its power and some cool physics.
-A soldier on a moving tram provides cover fire for another soldier who desperately tries to jump on while being pursued by a pack of houndeyes. He either makes the jump or falls and is consumed.
-A large pack of houndeyes chases a pair of marines into the player (alone or w/a Barney) in the office complex.

HECU
-Live executions of scientists and/or battles w/security guards.
-Houndeyes chase HECU into a tripmine trap, satchel trap or .50 cal emplacement and are killed off. Soldiers gloat, then vorts spawn and finish them off. It should be pretty easy to find some dialogue for this (e.g. “too easy,” “Shit!”). The vorts NEED to win a battle for storytelling purposes.
-More examples of defensive fortifications (i.e. sentries, tripmines, .50 cals) killing BM staff or Xenians. The HECU have better things to do than just wait for Gordon.
-4 way battle royale between HECU, aliens, security and Gordon.
-A sequence where the player can jump on a soldier’s tram, kill him and commandeer it.

[COLOR=‘Yellow’]Soundscaping and music
-There’s a really eerie sound effect near the beginning of HL OaR that’s almost supernatural in quality. It’s like a combination of wind, the howling of xenofauna and the screams of ghosts executed by the HECU. This effect works really well in early segments of OaR when the player is alone. Consider replicating or porting if possible.
-Most of the ambient sounds in OaR uncut should come from the hum of various machines and light fixtures. However, there’s potential to add some echo effects given the acoustic qualities of the tunnels. Rumbling effects could also work and would be associated w/debris falling from the ceiling.
-Given the added length of OaR uncut, you’ll have room to insert a couple of music tracks along the chapter. Ambient music or a piano short could work very well for a large puzzle element or an extended travel sequence. Combat music should reflect the more subdued nature and briefer durations of the battles staged in this chapter. Joel Nielsen supposedly has over 100 unused tracks for BMS. He could be helpful.

Potential uses for Community Project 12
The winners and finalists were shafted for w/e reason and their music was not included in BMS. You can find the tracks here: https://beemp3.com/index.php?q=cp12. To have a listen, click the “download now” button, then click the green “play” icon. You don’t actually have to download them.
Alone-piano section could potentially be used for a puzzle element or water area; this track would be PERFECT for the Xen teleporter puzzle
Dark Drone, Abrupt Awakening-can help reinforce the eerie/ominous nature of the rail system, which was the tone set in HL
The Year of Death, Soldiers have Arrived-potentially useful for a massive battle in the office complex
Baron Land-fits the piano theme of BMS C2A2A; possibly useful for a water area
Dark Skies-may be useable for a outdoor sequence based on a radically modified version of C2A2F and C2A2G
Resonance-early section could work in an extended sequence showcasing the number of scientists executed by the HECU, latter half is too heavy for a combat sequence
Tribulation, Soogai-does not fit OaR (Tribulation is beautiful though)
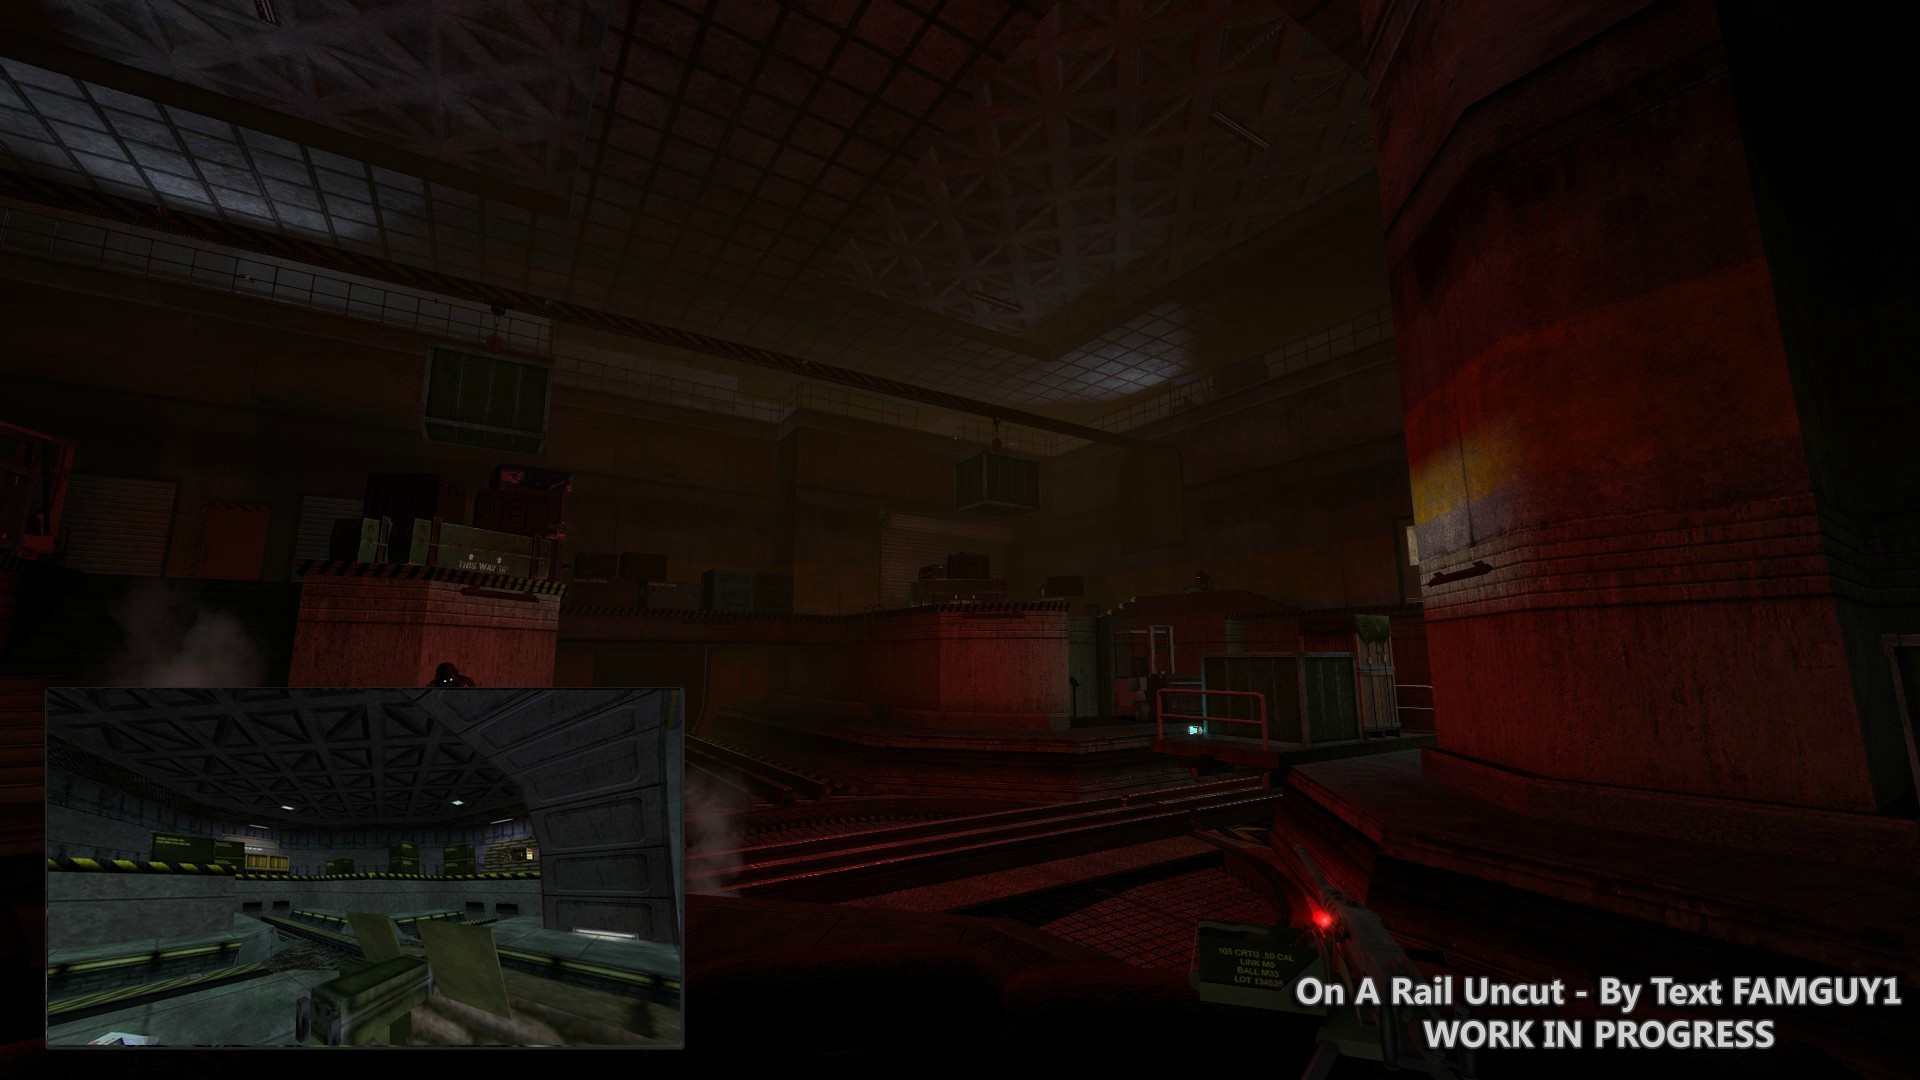
[COLOR=‘Yellow’]For combat music, I’d strongly recommend The Year of Death as it’s such a nasty track. Imagine it going off once the player gets to the second floor of C2A2B1. You could give the complex extremely poor lighting, w/only flickers showcasing the nasty handiwork of the HECU (e.g. scientist/security corpses). All of a sudden you see the eerie eyes of the nightvision marines approaching you or a pack of houndeyes lighting up the room w/their biouminescent attack, forcing a battle in otherwise near pitch blackness. Quite brilliant no? This reinforces the ominous nature of HL OaR, keeps to the piano theme of BMS OaR, showcases the flashlight (would be even better if it had a battery life) and requires minimal redesign of C2A2B1 and C2A2C, which were nicely done. The complex could be illuminated after the battle by hitting a power switch.
The best choice for ambient music is less clear. While Dark Drone and Abrupt Awakening would reinforce the eerie nature of the rail system, a piano short would be more consistent thematically w/the tone set by BMS, which is different from (but not necessarily worse than) HL. It might be best to wait until the new maps are created to render a decision.

[COLOR=‘Yellow’]More radical suggestions
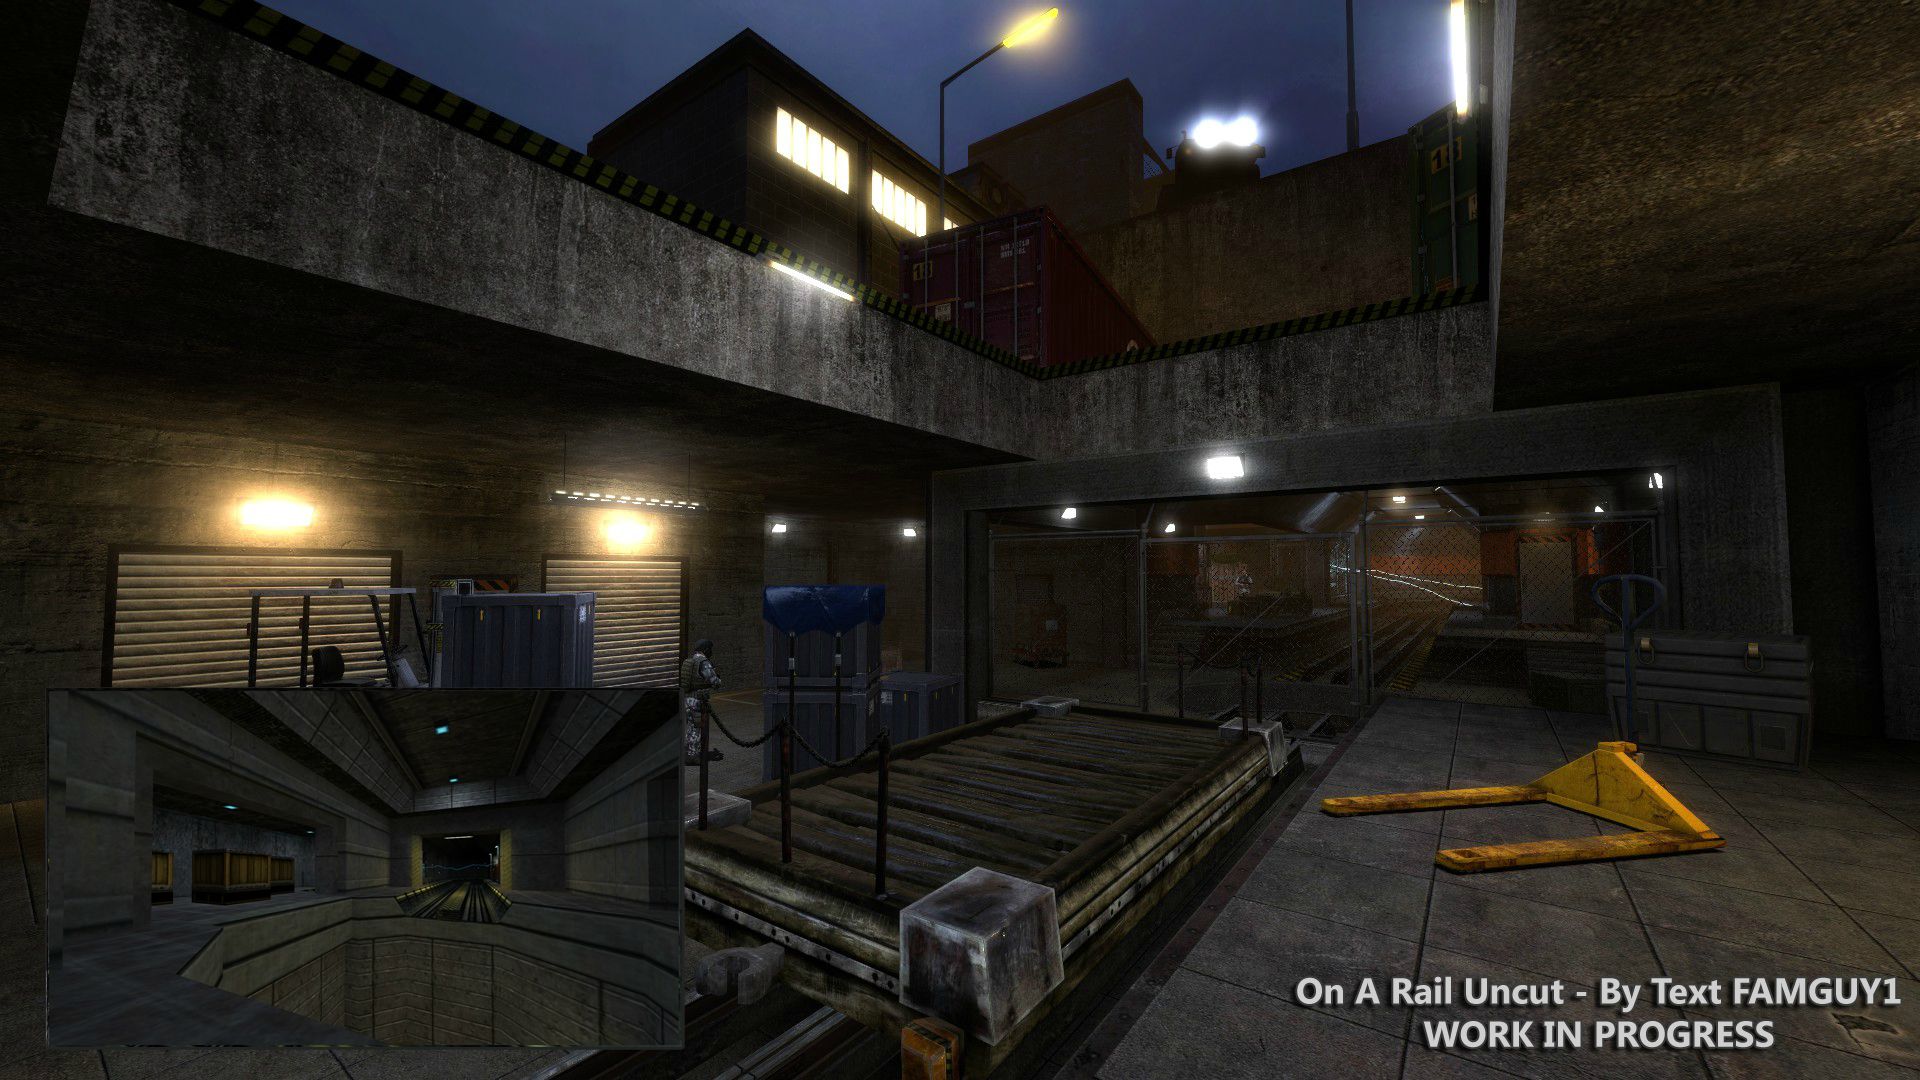
-Create a section of tram travel in an OUTDOOR setting toward the end of OaR. The problem w/HL is that far too much of it takes place indoors, which is boring. This new section would spice things up, potentially as an extension of C2A2G and would allow integration of the missing sniper w/o modifying BMS C2A2C. Many story elements could be introduced w/in a beautiful skybox, such as 3 Ospreys landing near a facility and deploying marines (corresponds to the evac in ST_uncut) and/or an Apache flying in the direction of Apprehension (perhaps the one that lands near the black ops). The tram track could terminate in a closed silo door, forcing the player inside and permitting a smooth transition to BMS C2A2C.
-Have the outside world more visible from your sections, whether through windows of the office complex, ceiling or simply w/security cameras. This helps alleviate the sense of claustrophobia and reinforces your purpose, which is to get outside and launch the rocket.
-The sentry/tripmine trap at the beginning of C2A2G can be ported to the end of C2A2F at the "“Sector E Mat. Trans. A” area. In HL, the tram could not be placed on the lift, because it was broken and stuck at the bottom of C2A2G. Instead, you could make the lift functional but stop working mid-descent, putting the player at the level of the trap. The player would later descend into C2A2G via ladder like in HL. By implementing this, you not only keep the trap but can also use the excess vertical space to significantly expand the materials transport theme (which is incompletely realized in this section of HL) w/the addition of loaders, both functional and nonfunctional (seen in Inbound). These units are really cool but criminally underused. They could also be placed in earlier sections of C2A2F as well as C2A2G where they could place crates on trams.

Design aesthetics
Aside from OaR, here are some useful BMS chapters to reference once you start adding textures/props:
-Office Complex, QE administrative section: good for finding props/furniture to use in the office complex-themed map; however, the overall aesthetics of this section should match the office in BMS C2A2B for consistency
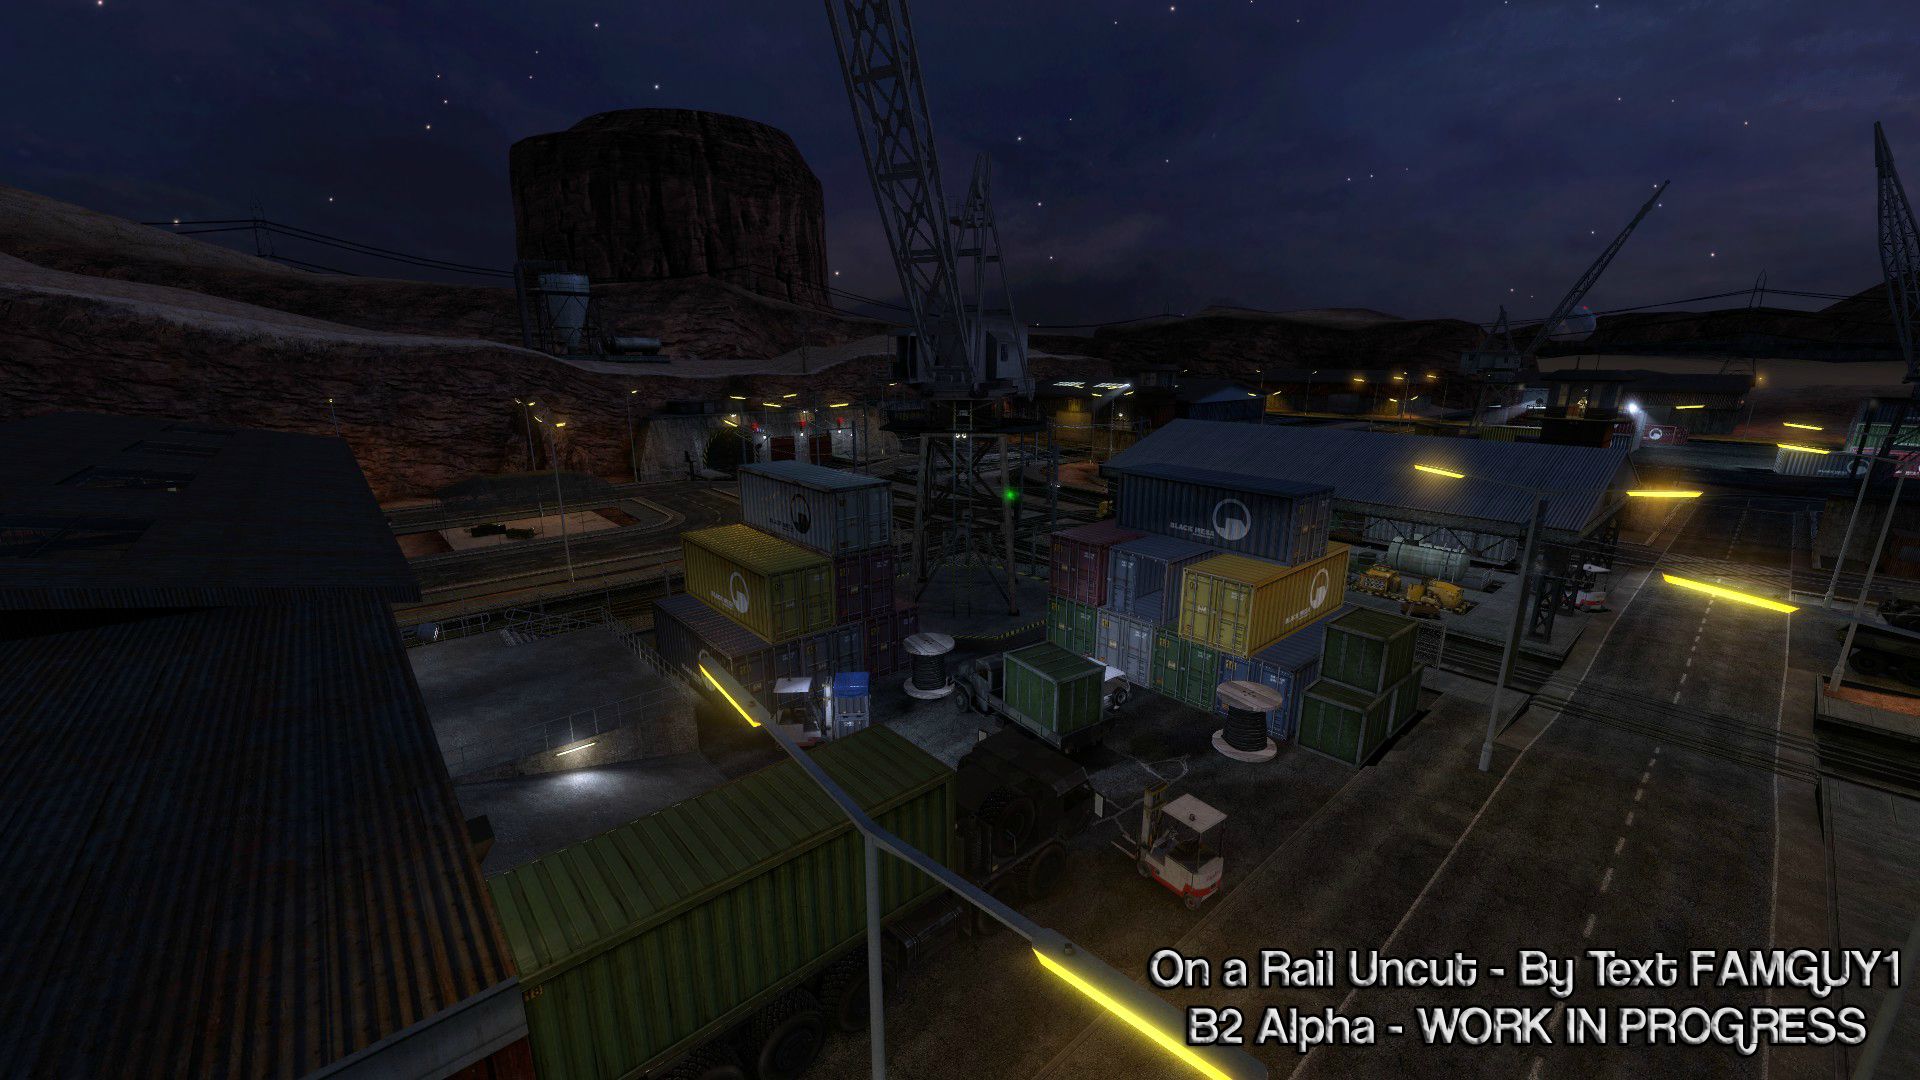
-Residue Processing, Inbound (to a lesser extent): great places for inspiration in designing the materials transport section
-Blast Pit, Apprehension: shitty looking areas roughly the same age as OaR; potentially lots of useful props and texture themes

[COLOR=‘Yellow’]Dev errors (only a few)
Consider fixing these should you need to decompile the maps:
-The houndeye pack in BMS C2A2A should be able to walk over the rails…otherwise they just stand there and look stupid while you shoot them. In HL, they could not do this because the rail was electrified, but BMS rails are NOT electrified, so it makes no sense why they cannot cross over.
-The player can clip through HECU ammo cartridges in the following places: 1) by the green crate w/medkit at the junction of C2A2A and C2A2B (near the sentry turret trap) 2) at the .50 cal in C2A2C just prior to the outside area.
-The HECU/vort battle in C2A2B is poorly scripted. The trigger point for the 2nd vort spawn needs to be set back just behind the gray crate in the corridor. This ensures the vorts serve as effective fodder and will buy the player time to take out the .50 cal emplacement.
-The launch pad elevating the rocket needs to be outfitted w/more scaffolds (think NASA shuttle launches). The current “scaffold” (really just a pole w/a couple of wires connecting to the rocket) would not realistically facilitate a vertical launch. After placing the new scaffolds, they could be scripted to fall over during the launch.
-One of the triangular faces of the large globe seen from the launch room has a messed up texture that makes it glisten.
-After leaving the launch control room, you can actually escape through the inaccessible door by breaking its windows and using props to elevate yourself. Doing so will trap you in an area w/no textures.

Final point
HL OaR is mediocrity and as one modder recently found out, mediocrity redone is simply mediocrity in HD. Don’t be afraid to stray from the norm. Good luck.

Image gallery (#1-5 on page 1, #6-10 on page 2)
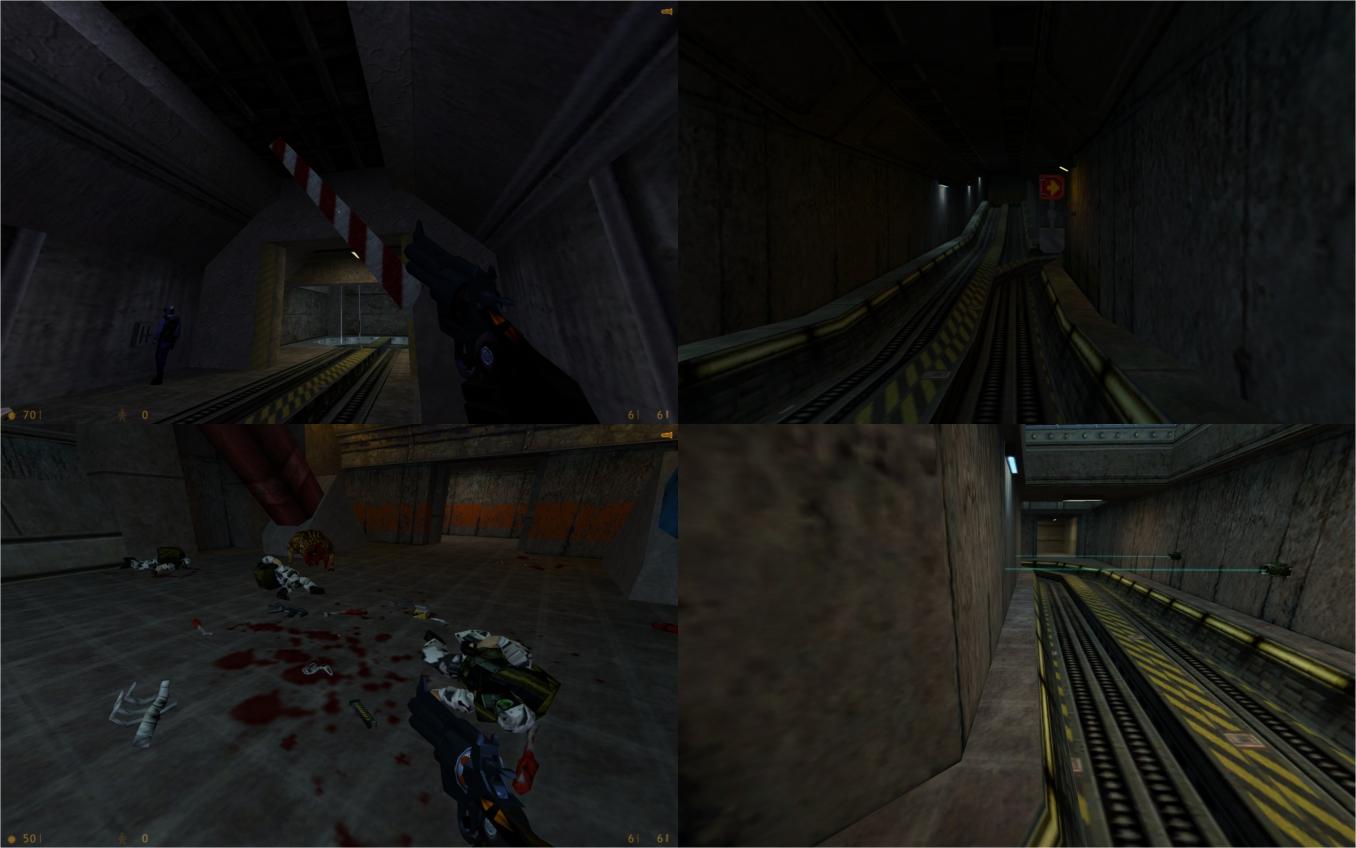
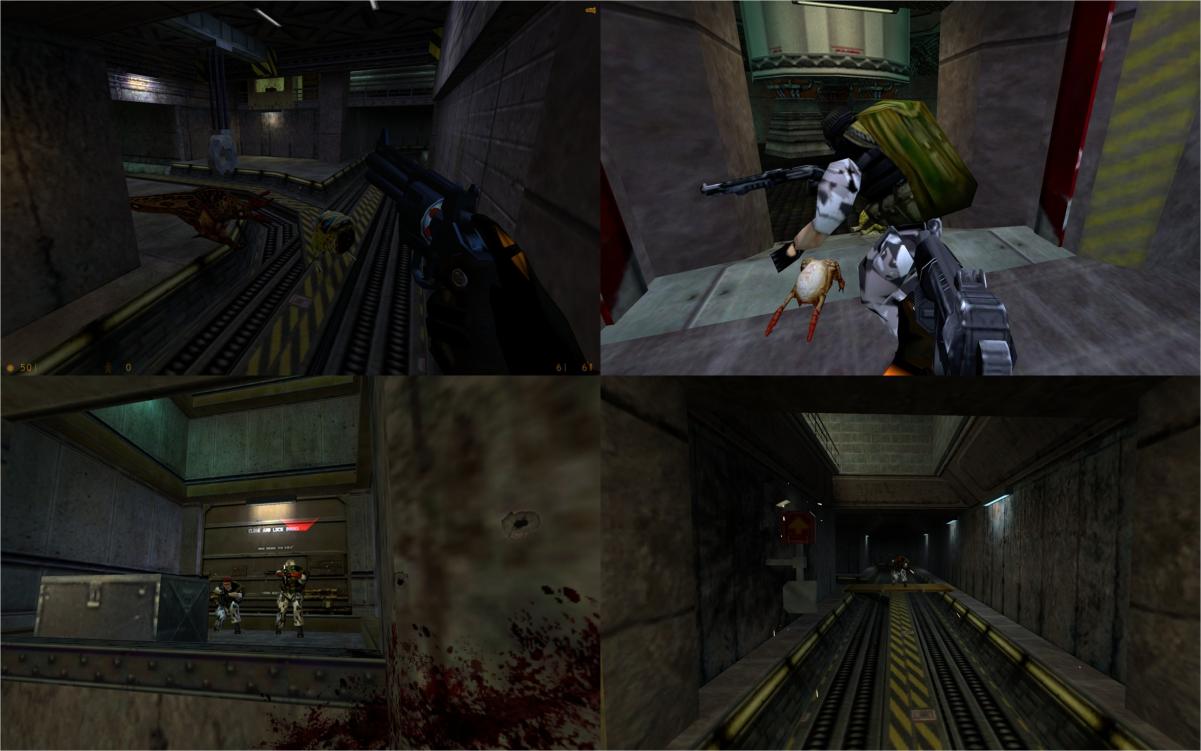
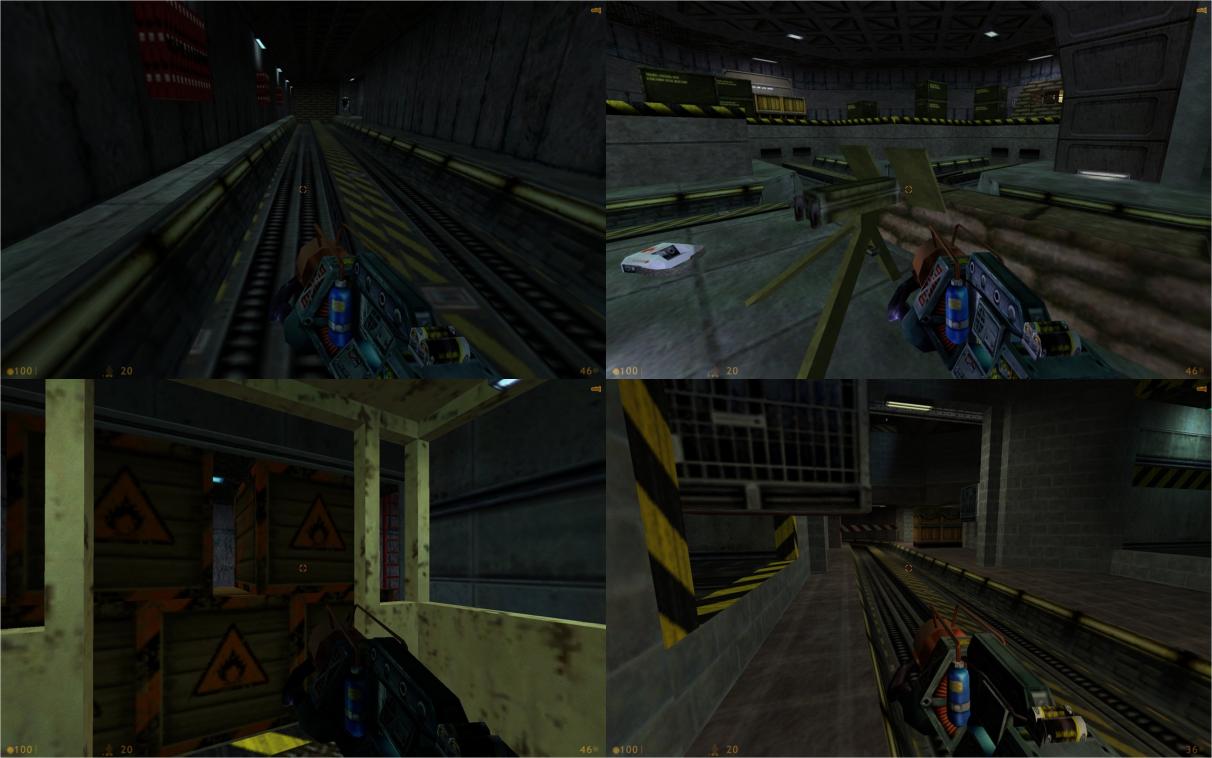
Image 1 (pervasive themes of OaR)-TL: Toll gates, usually activated by hitting a nearby switch (seen here). TR: Rail switch element; given the digitized switch system and fixed rails seen in BMS OaR, a control panel design (rather than a lever) would be the best way to go. BL: Bullsquid eats marines; note the unrealistic number of dead marines by the bullsquid. Skeletal segments from the HL2 Ep 2 model would work great here. BR: Tripmine traps; most traps are placed at bends.

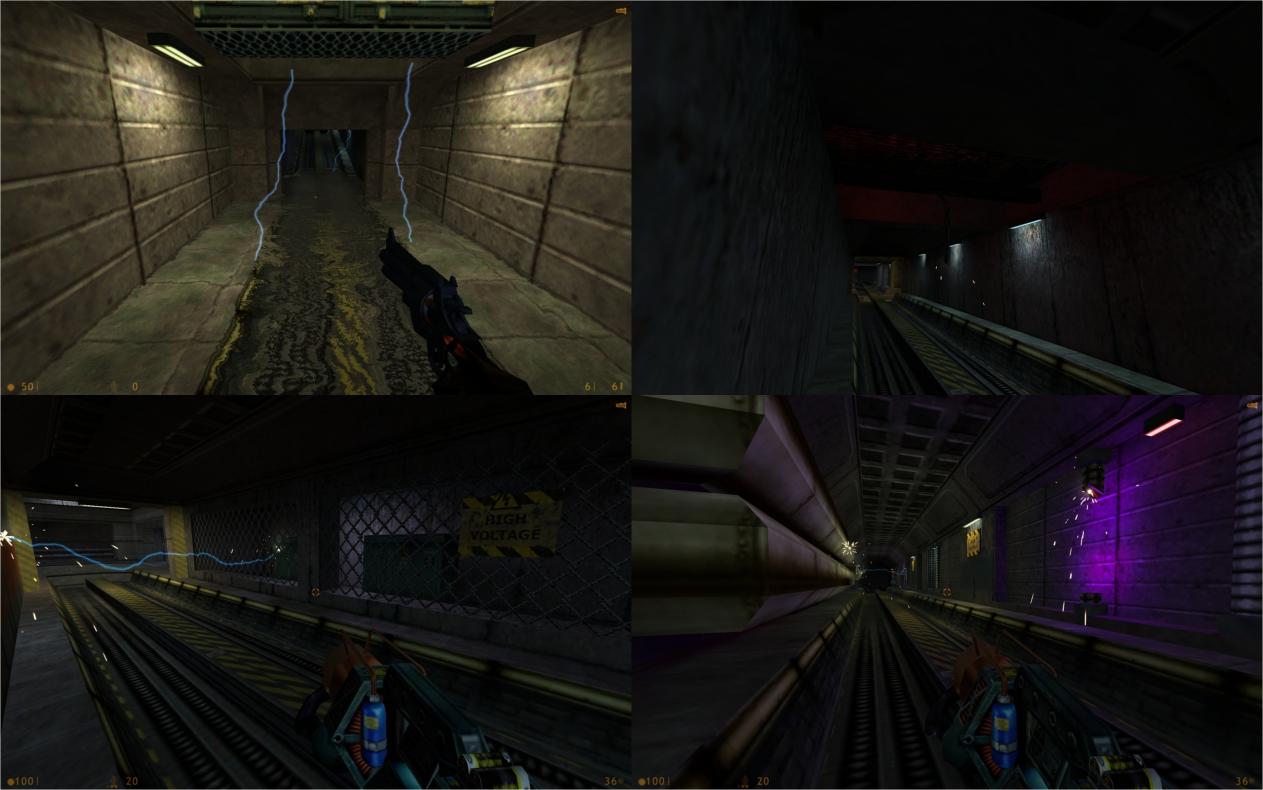
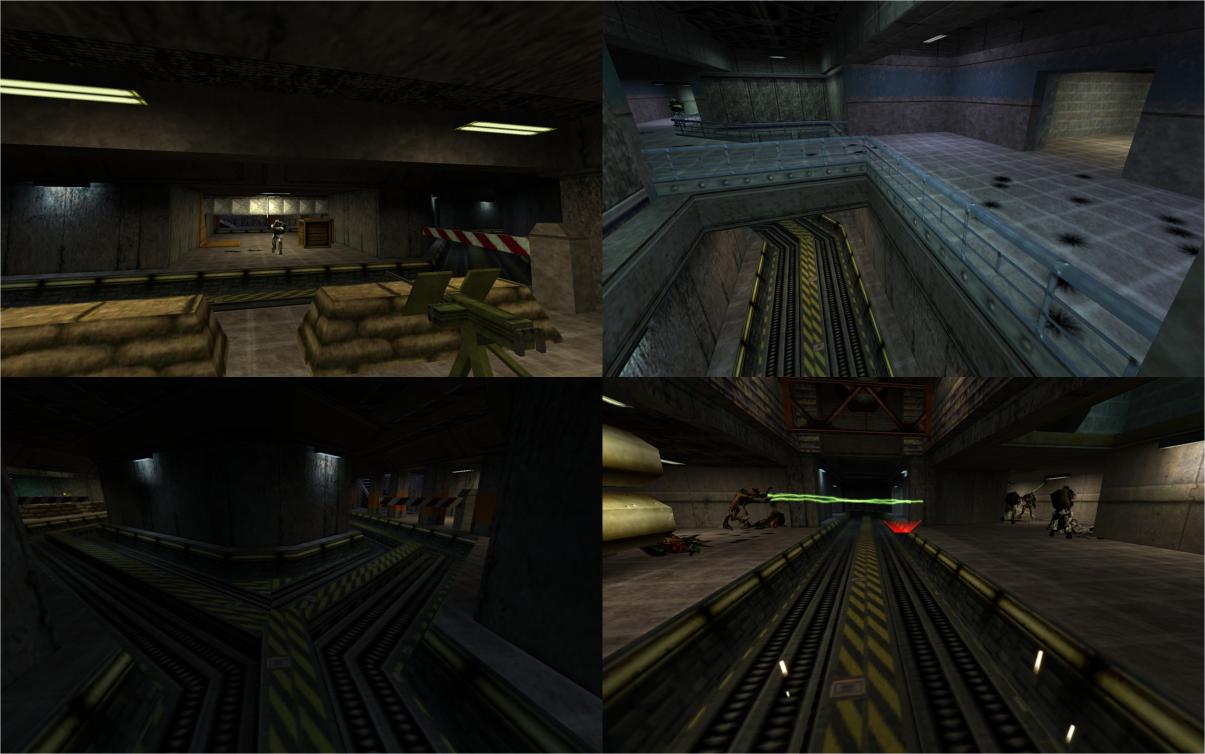
Image 2 (electrical obstacles)-TL: Electricity coming from nowhere (seen here) or from light fixtures (C2A2A); these elements are unrealistic and should be discarded. TR: Wires (C2A2A). BL: Boxes in high voltage areas (C2A2F); BR: Long series of electrical obstacles (C2A2F); this configuration is rather unique and should be retained.

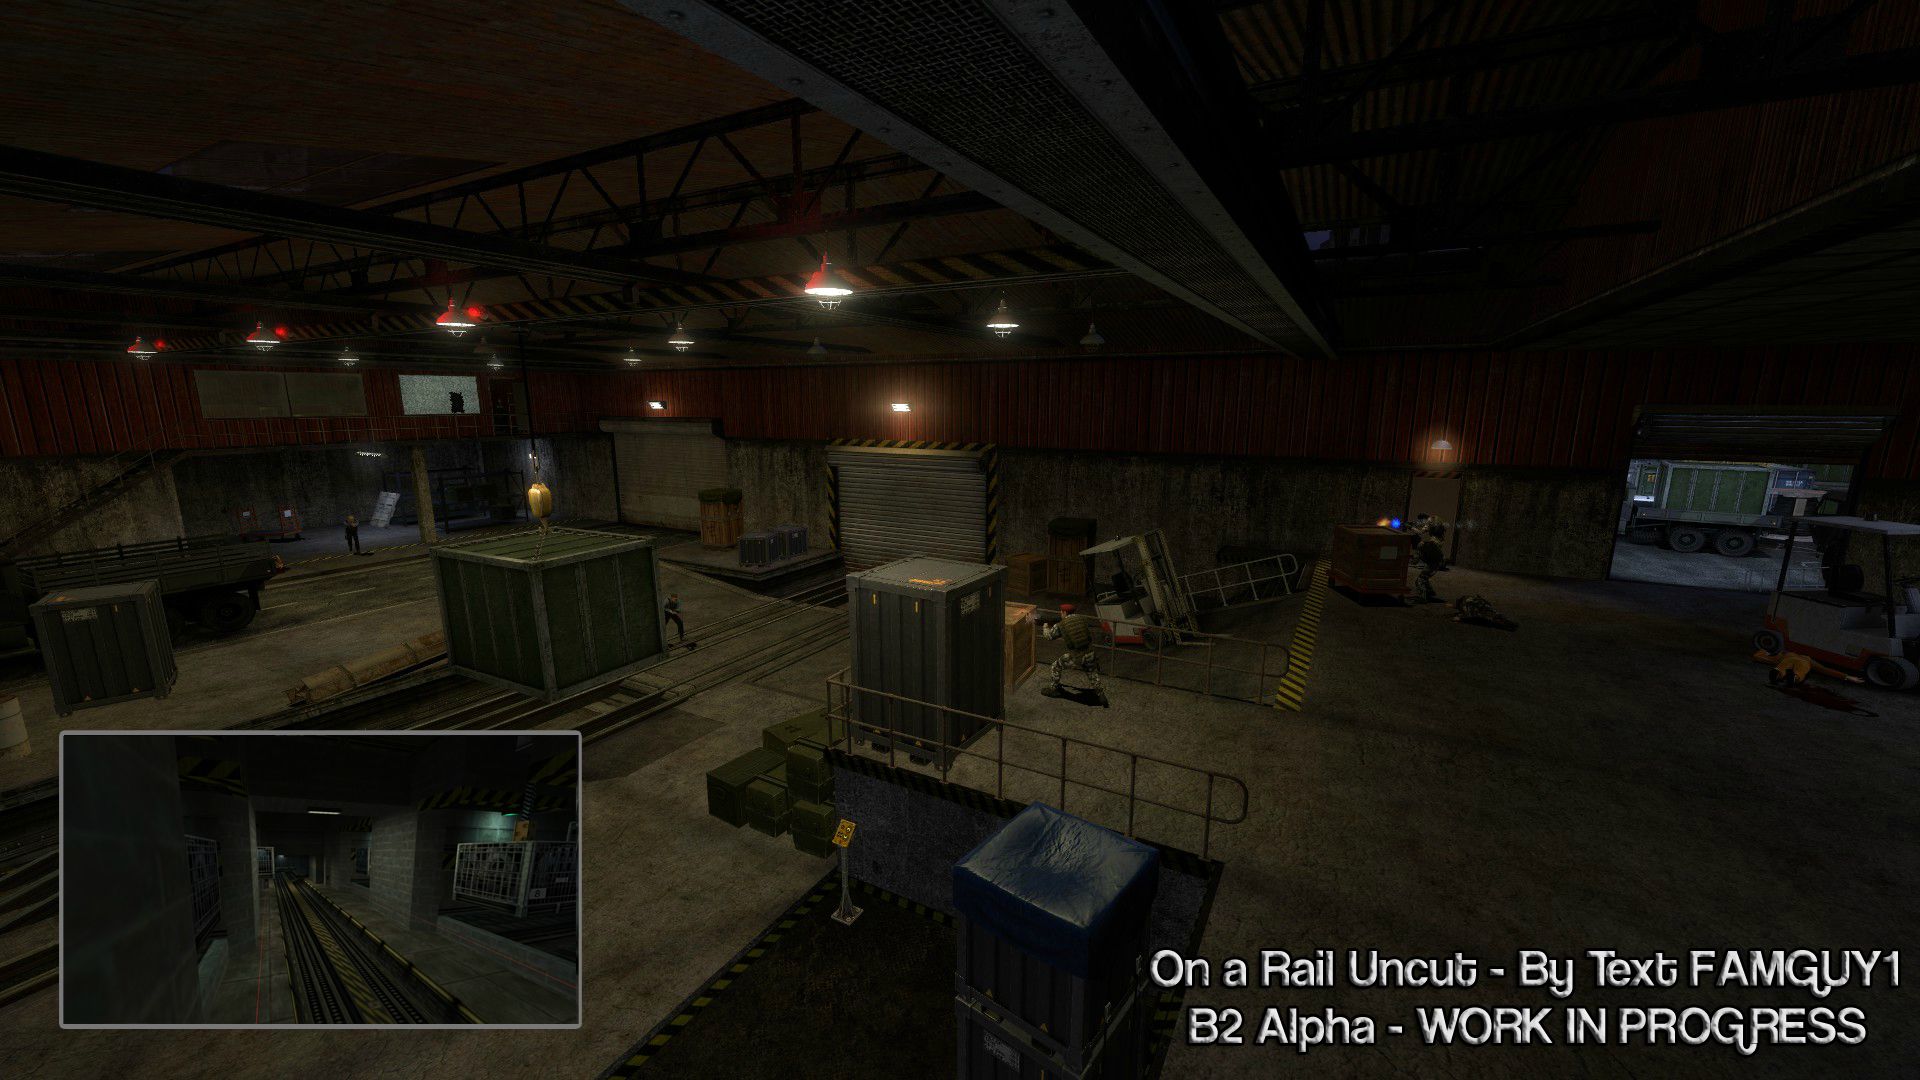
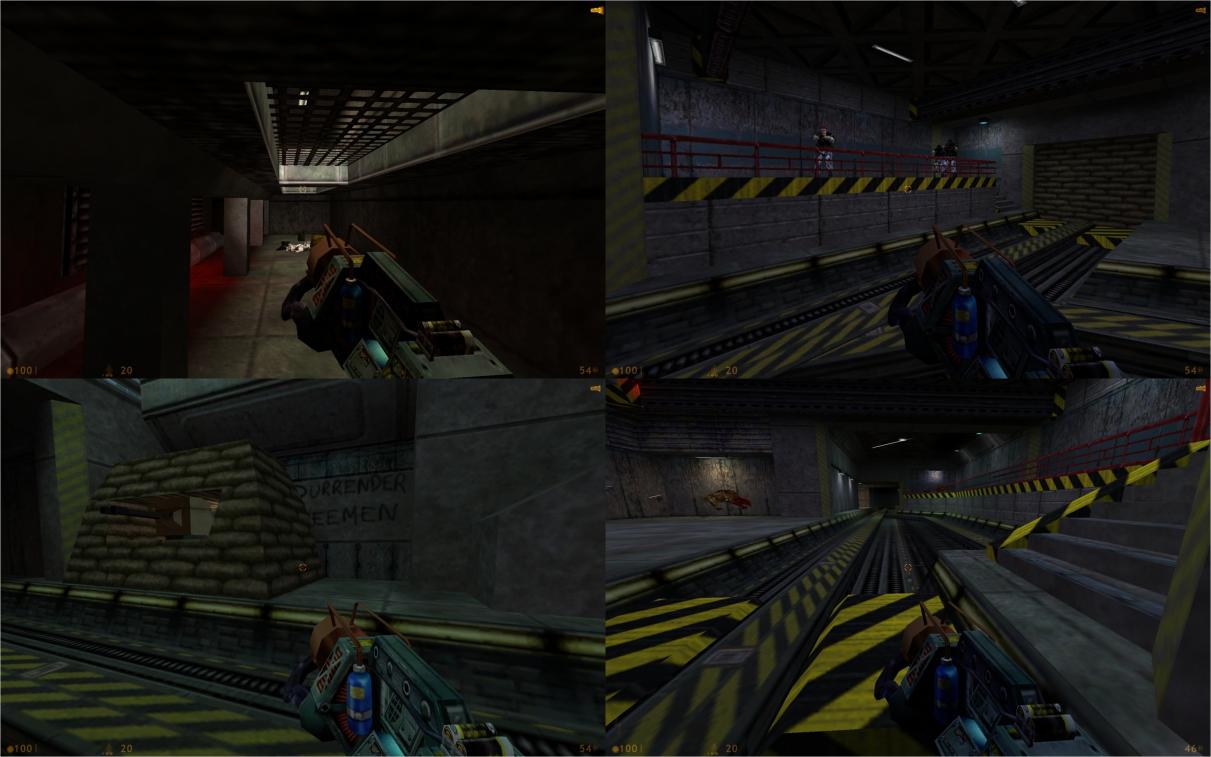
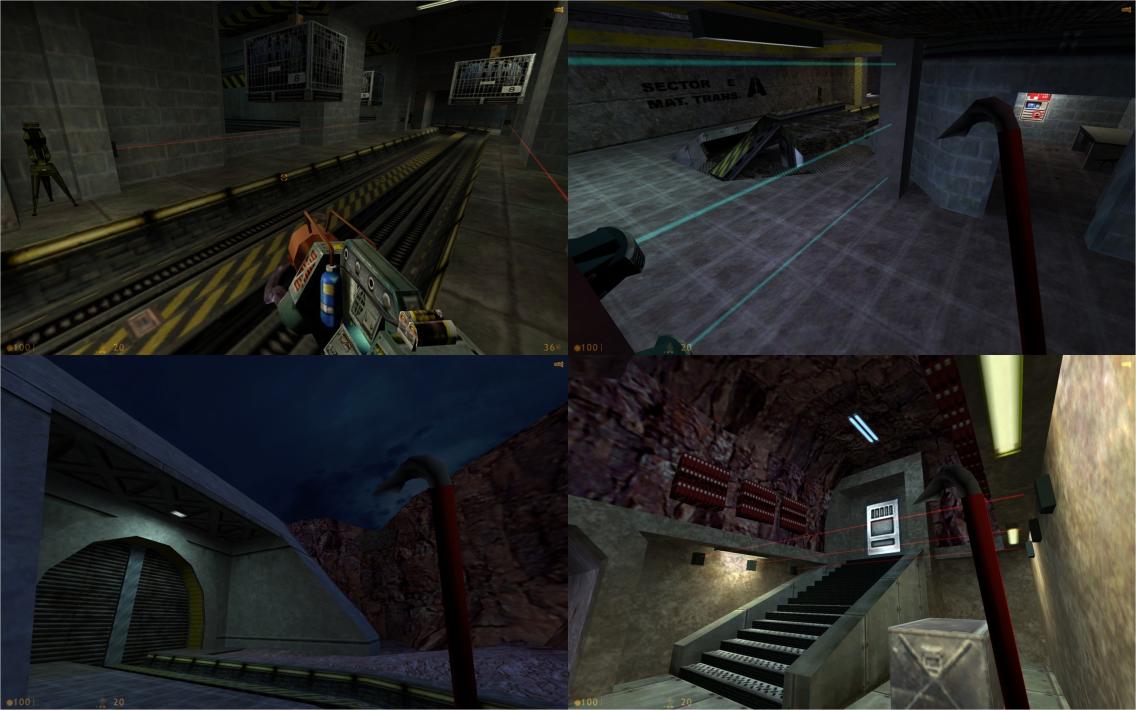
Image 3-TL: The claw (C2A2A). TR: Rocket base w/stranded marine being attacked by headcrabs (C2A2B2). This cannot be replicated faithfully in BMS OaR because of the launch system design. BL: Marines on lift (C2A2B1); the lift goes up as your tram goes up. The marines have been swapped w/sentries in BMS C2A2A. BR: Marine on wooden platform (C2A2B1); he’s the only one in OaR that can be crushed by the tram.

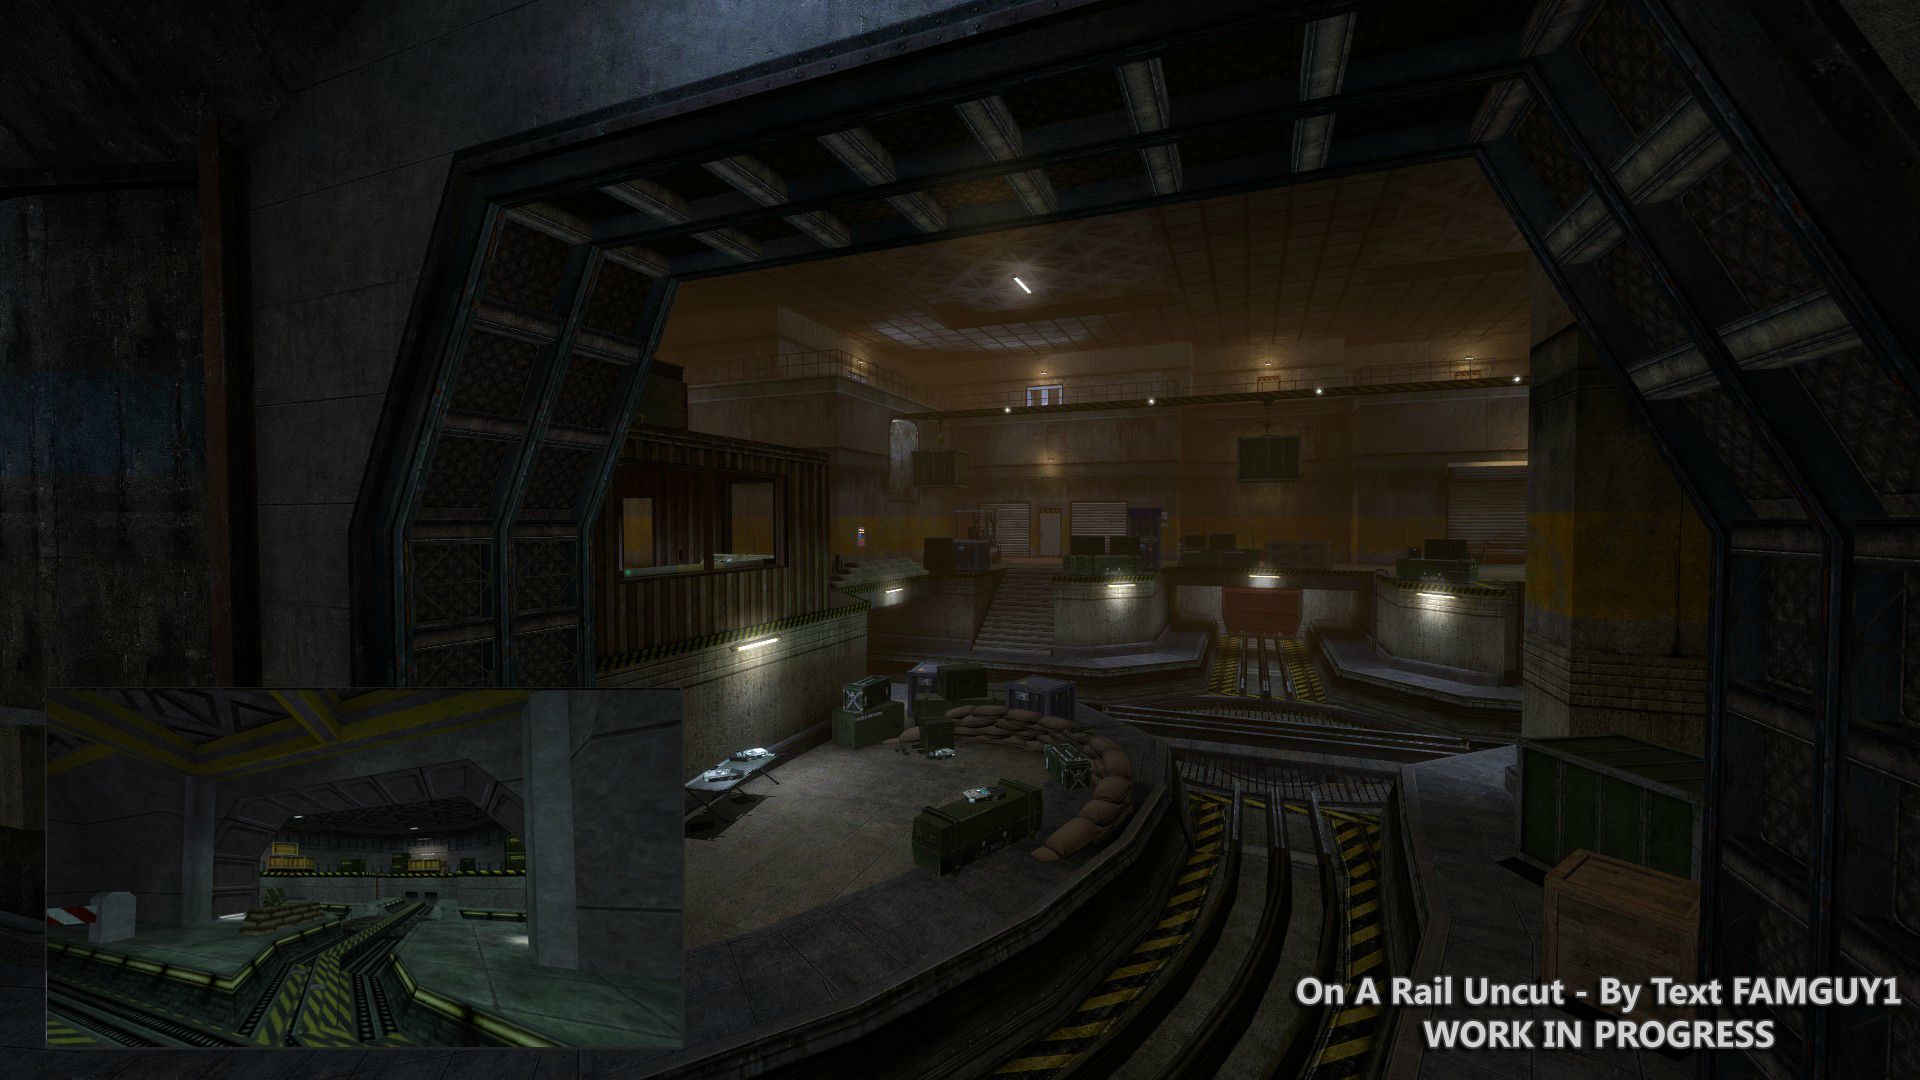
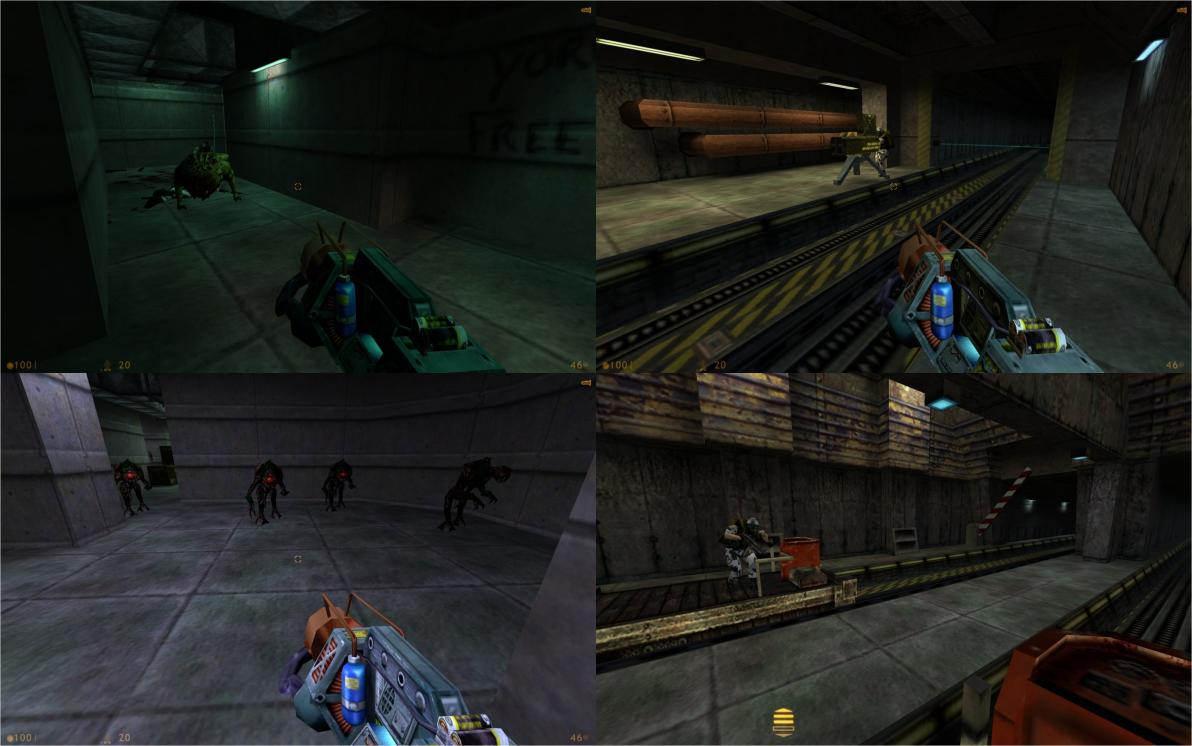
Image 4-TL: 1st floor of office complex (C2A2B1); important elements to retain here are the toll gates, converging track elements, .50 cal and the aesthetic vent. The HECU/vort battle that takes place here is absent from BMS OaR. TR: 2nd floor of office complex (C2A2C); the fairly complex architecture spreads across the track. BL: A view of the unique converging track element (C2A2B1) as seen from C2A2C. BR: Another HECU/vort battle scrapped from BMS OaR (C2A2C).

Image 5-TL: The hidden area where you can sometimes observe the HECU battle above (C2A2C); this is the closest thing to a vent sequence in the entire chapter and should be retained. TR: 3 marine ambush (C2A2D); these guys were scrapped in BMS C2A2B. BL: The “surrender Freeman” decal (C2A2D); this is absent from BMS OaR. BR: The sentry turret trap; note the jumping animation on the bullsquid in reaction to being shot.

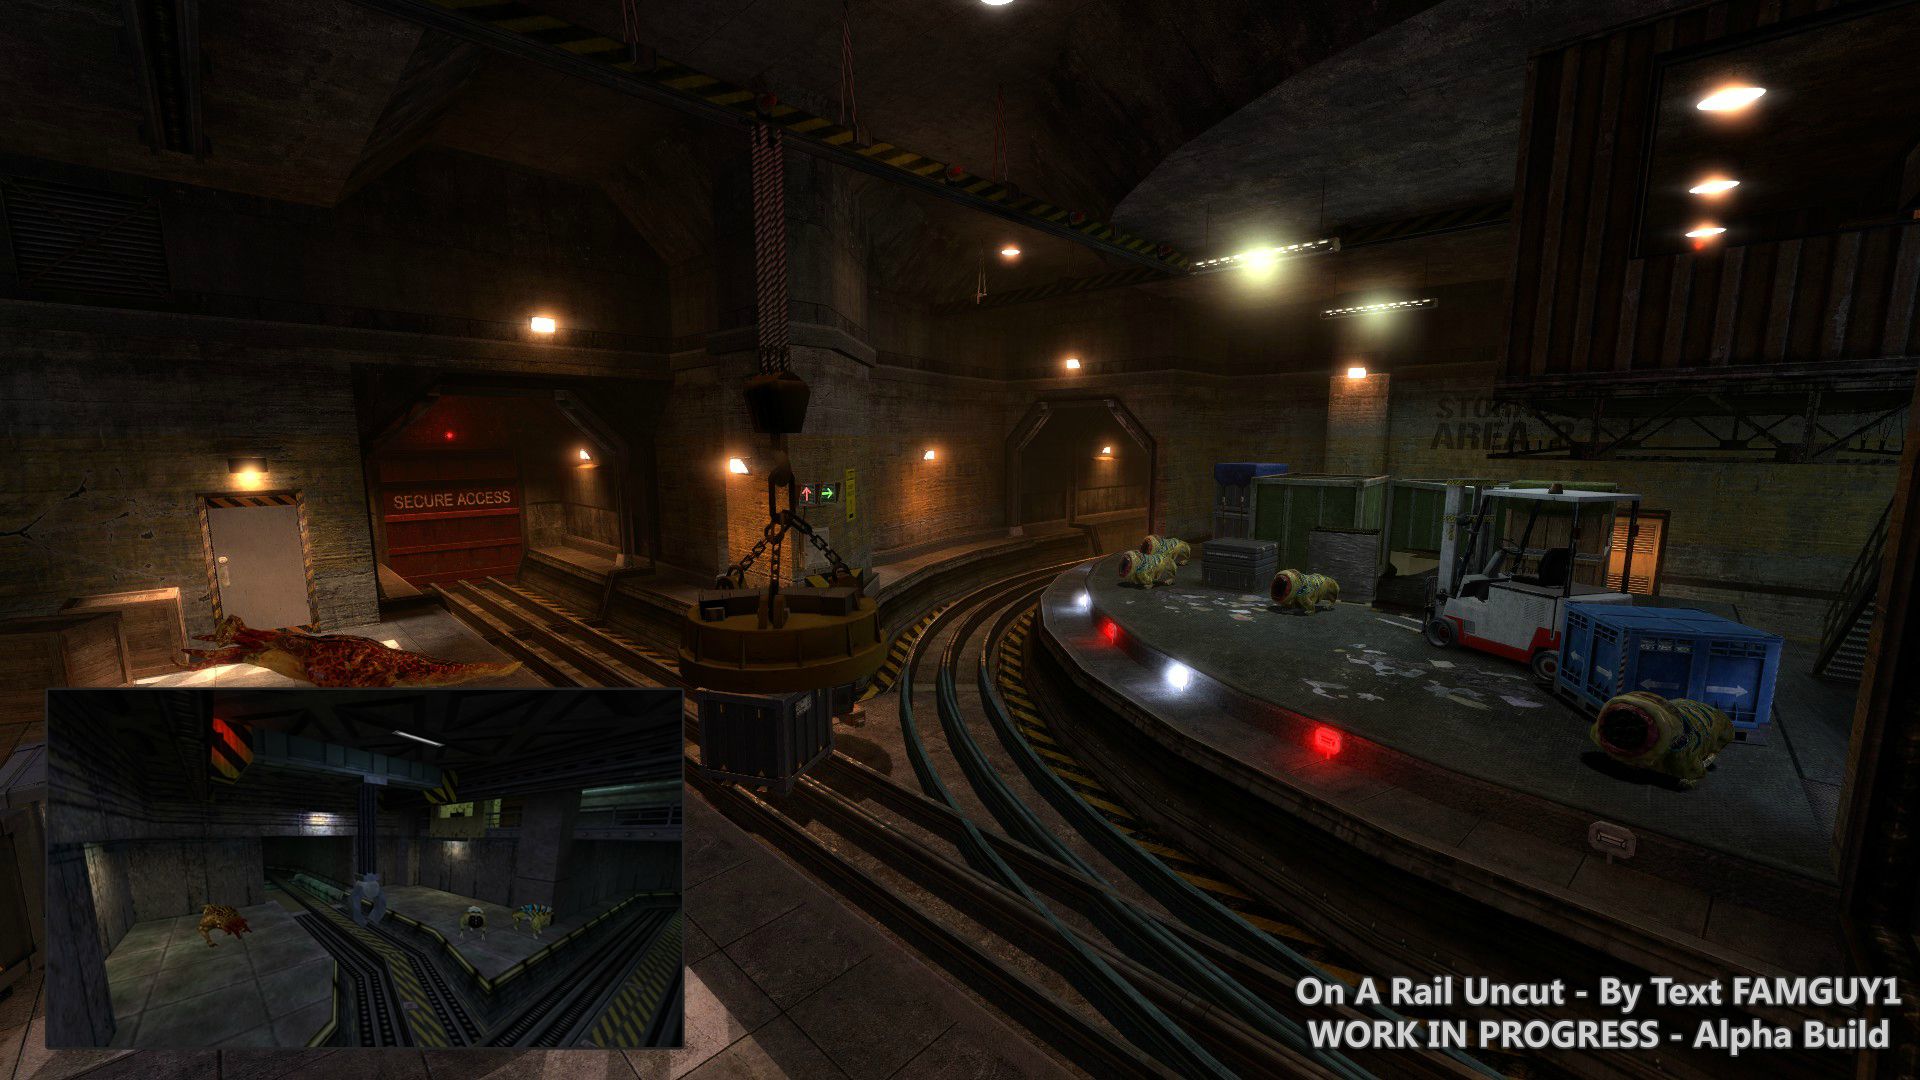
Image 6-TL: A side room in the sentry trap area (C2A2D); the placement of the “yore dead Freeman” sign makes no sense as it’s in a tiny closed-off area that may not even be explored. TR: TOW launcher (x2 total, found in C2A2E and C2A2F). BL: Vort ambush (C2A2E); the vorts have backed a pair of HECU into a corner and another pair of vorts patrol the corridor. Behind the green crates lies a pair of tripmines. The 2 stranded soldiers can be found guarding a gate switch further back. BR: Commandeering a tram from a soldier (C2A2E); pressing the gate switch will release two gates. Should you backtrack to retrieve the original tram, you will trigger this scene. The soldier’s tram takes you down the correct path.

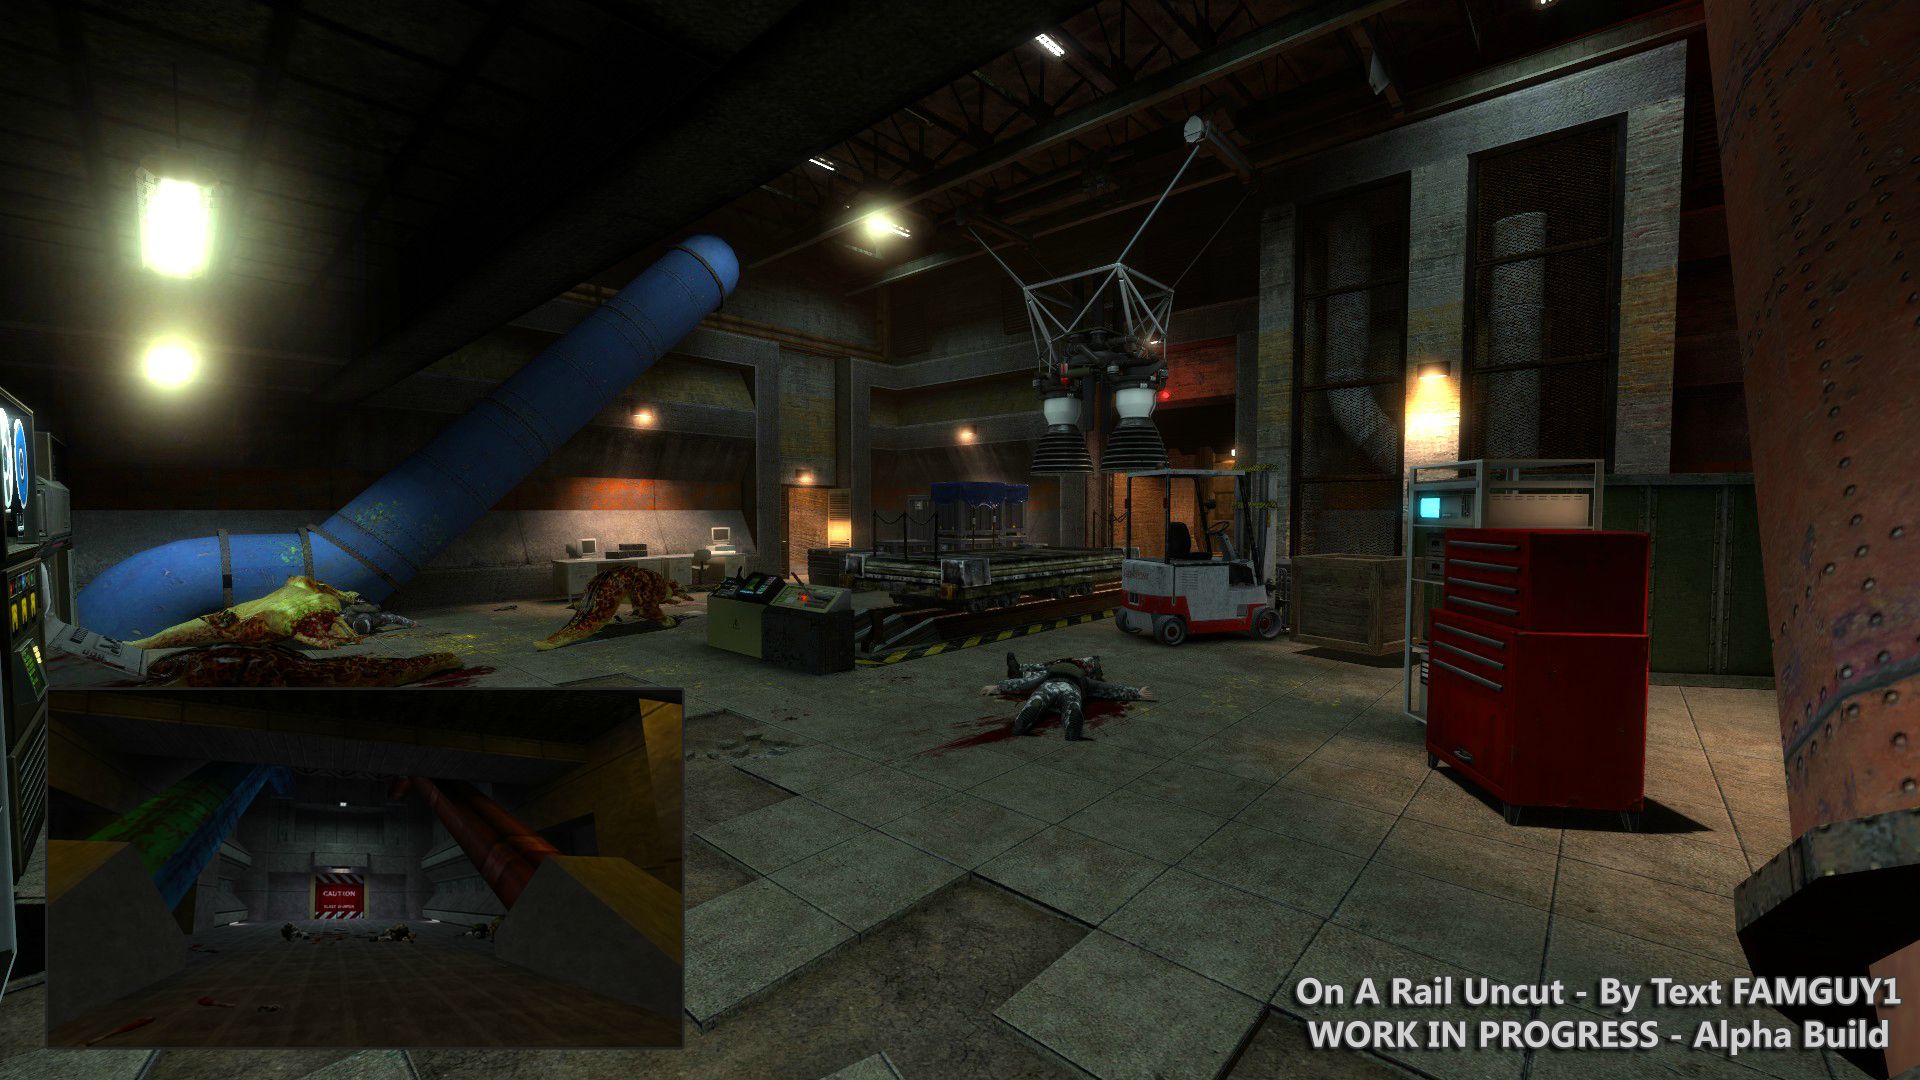
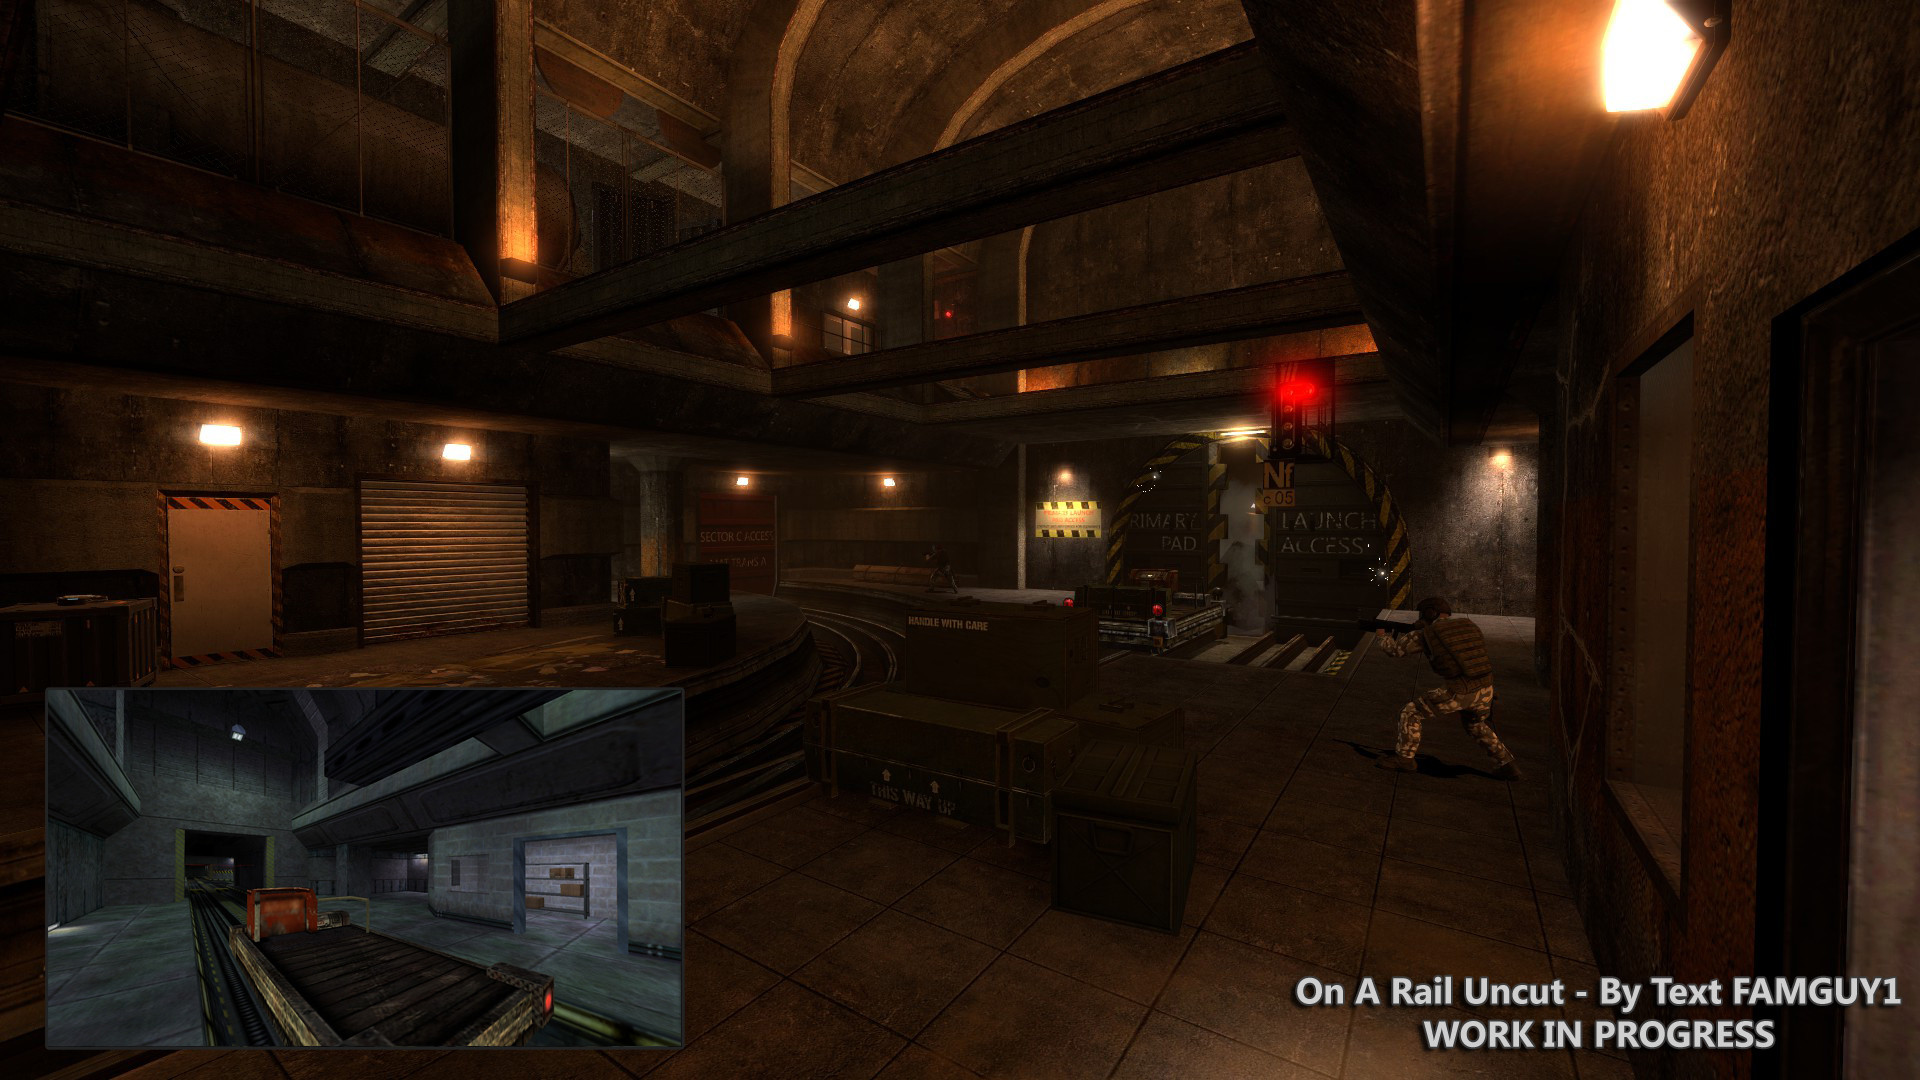
Image 7-TL: Dyne-O-Mite (C2A2E); failure to commandeer the soldier’s tram will lead you here. TR: An iconic ambush by the HECU (C2A2E) BL: Explosive crates on the top floor seen when using the elevator (C2A2E); a satchel needs to be used to trigger the detonation but consider having a houndeye set it off with its attack for a “think fast” moment. BR: Lower floor themed as a materials transport area (C2A2F); 2 marines await in ambush behind the crates.

Image 8-TL: Upper floor of the materials transport area (C2A2F); in theory, the placement of the beams should set off the sentries if a crate knocks the player off the tram. TR: Sentry turrets line all 4 corners of the main room (C2A2G); a pair of zombies waits in ambush in the small room. This is where the material transport theme abruptly ends. Consider porting the scene to a higher floor to further develop the theme. BL: Sniper nest (C2A2G); note that its location is meant to prevent the player from exploring the wrong side of the map. BR: Dynamite trap (C2A2H); this was scrapped in BMS OaR but potentially could be reused in a redesigned version of C2A2G.

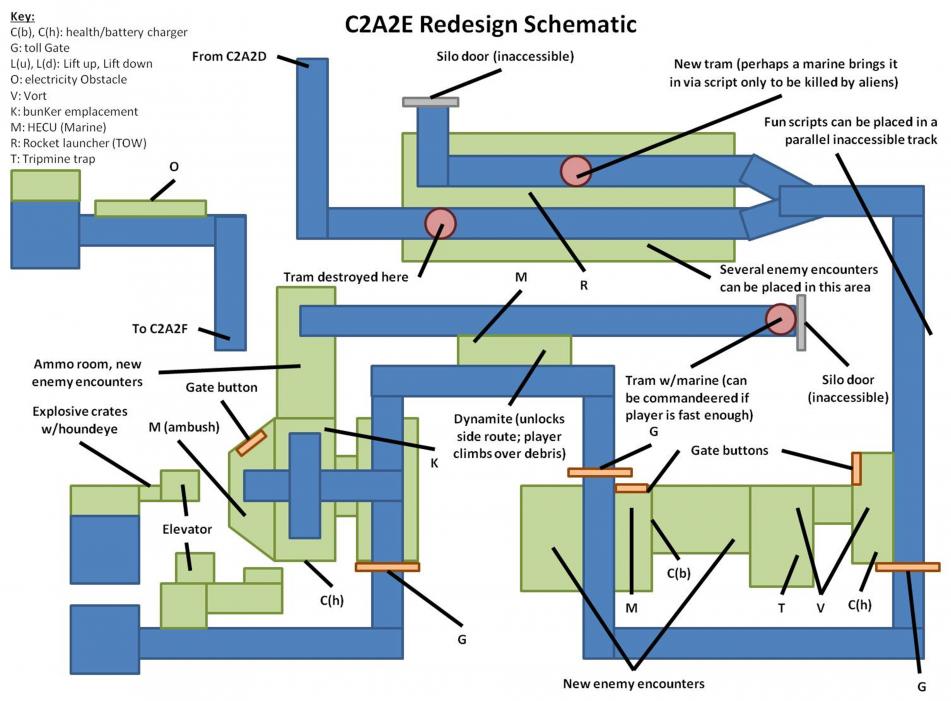
[COLOR=‘Yellow’]Image 9-C2A2E redesign schematic; this map layout has several advantages which include 1) working w/in the constraints set by the BMS TOW launcher which destroys the tram 2) extremely faithful to the HL C2A2E layout 3) retains ALL of the memorable features in this section 4) eliminates confusing map elements 5) provides room for several additional encounters and scripts. Note that the dynamite trap unlocks a side route to get to the ambush. Taking the main route is faster, w/o the need to backtrack but places you at a disadvantage as you are on the low ground and in the .50 cal’s line of fire. Taking the side route is slower and you will eventually need to retrieve your tram. However, you will obtain good ammo and will end up on high ground, giving you the chance to ambush the .50 cal marine. This schematic does not include the latter 1/2 of HL C2A2D, which was cut out in BMS and should be re-added. However, you may not be able to fit both this section and C2A2E on a single Source map. In that case, simply port the section of C2A2E after the marine ambush (by the 4-way junction) to your next map.

Image 10-C2A2G redesign schematic; since C2A2F is a compact and relatively well-designed area that uses vertical space efficiently, there will likely be room to recreate the 1st half of C2A2G, which was cut from BMS. The schematic provides a rough idea of how it could be done and how it would link to BMS C2A2C. The outdoor area could simply be considered an extension of the quiet area from HL, rather than a radical departure in design…this map should be challenging but fun to make as it affords much room for creativity. Should the claw not be introduced in a C2A2B2 themed section, it could make a late chapter appearance either here or in C2A2F (better placement for breaking up the action) as it’ll fit right in w/the materials transport theme. Perhaps there’s some large crates obstructing the exit to the outdoor area which requires the claw to move them (think crane from HL2).


Can’t wait. Your ST Uncut was dev-quality and I have no lower expectations of OAR! I guess the main thing that bugged me about OAR was that there was no clear conveyance of direction. You were just going around in circles and there was no sense of progress. Maybe some very long pieces of straight-ish track (obviously with encounters and puzzles along the way) would help with this.

Done the changes requested in the first post.

Another expansion project?
Damn, how much free time you got?

Cheers Wangman for posting that, I was gonna ask that you do. I’m not sure how closely I’ll stick to all that, but I’m sure by now you’ve figured out how I work, and you can’t argue with the results. Still a useful read for everyone involved. I’m going for 3 maps by now I’ve pretty much decided on - 2 before Black Mesa’s C2A5A and 1 after.

Yeah, OaR was about the journey. Though in HL1, the journey may have been fairly dull(ish), it still made the end destination (the rocket) far more satisfying to reach. It wasn’t really very satisfying in BM, for this reason. Felt too short.

Thanks. Much appreciated.

  1. I’m a university student, so more than I can handle. Damn it’s good.
  2. I’m a pretty fast mapper as it is anyway.

Thanks for taking the time to work on these awesome addons. ST Uncut is already a must whenever I play the game now, and I’m sure OAR Uncut will be just as essential.

Although there were some, we didn’t see nearly enough lightning hazards in Black Mesa. It’d be nice to see a few more make a return. One of my fave “obstacle courses” in Half Life was ducking in time to avoid the lightning strikes while riding the tram.

It might be a lot of work, but I wonder if it’d be worth trying to get the rails properly electrified again? Kinda missed that element in BM, it made you really wanna stay with the tram in the original. The way it is now makes the foreshadowing during the intro ride a bit pointless, “stay away from electrified rails” …that don’t hurt you :stuck_out_tongue:

Good luck with your mapping!

^^ this…it’s probably the only way to get people not to wander off per pedes, which has always been quite tempting; especially once you notice that moving along with/on the tram pretty much renders you the very equivalent of a sitting duck…

Text, Did you checked this?

It’s dev’s old OAR cocept. Maybe it could be useful.

Some people hated the electrified rails. How about putting that element where water exists only?

Some of that’s quite useful. Picture C1 in particular brought back some memories and got the creative juices flowing a bit. That’s one room in particular I’d really like to bring back. The two things which immediately jump to mind when I think of HL1 OaR is the bit where you walk under a grate and you watch the HECU / Vorts fight above you, and that picture from C1. Those are two scenes I’m definitely going to bring back.

Electrifying the railings is, funnily enough, really, really not that difficult. This is why I’m almost certain not having them electrified was a purposeful design decision by the devs. You just create an invisible trigger brush along the floor by the rail (shouldn’t be difficult to do, you can just clone the very base floor part of the track, change it to trigger texture, and elevate it slightly), tie it to a trigger_hurt. Then under trigger_hurt settings, set damage type to “Shock”, and the damage model to “Doubling w/ Forgiveness”. VERY easy.

As to whether or not to electrify the rails in my OaR, I can figure it out later. I need to get a community consensus first. On the one hand, it makes the game more about the rail because you don’t really want to go anywhere without the train once the railings are electrified. On the other hand, it defeats movement sometimes in a very annoying way, and it makes it very painful when you lose the train.

I hate to say, but I’d have to say going against electrifying the rails. You’d have to recompile Power Up as well as the BM dev maps (although you’ll likely have to to keep consistency with your project on OAR), I’ll leave it to you, but I’d say no.

And agreed with Wangman on most of the stuff he posted about, I really did feel that OAR in BM was lacking, though that was mostly because of the length of it.

@Wang I don’t think there’s any more cut dialogue you can use, but you could put together most of the dialogue inside of the vo folder for introducing story elements (I.E. The military ramping up their search for freeman, or requesting back up at a particular location), I’ll see if I can string some stuff together later on… I’ve been using the audio program audacity and stringing together some sounds from Counter-Strike & Half-Life 1/2 for my own personal use. Rather useful once you get the hang of it…

I use Audacity for all my audio editing, really nifty.

Really excited for this, ST uncut is an official part of my BM install forever now.

If you need some loose inspiration for the journey elements of OaR besides OaR itself, you might want to go back and play “Highway 17” in HL2, that chapter was really good at making you feel like you traveled a lot.

And as a little authenticity suggestion, seeing as how OaR is the only night chapter in the game, perhaps you should make the HECU in outdoor/darker sections use the Night Vision Goggles. It was pretty stupid how they made those, and then only put them in one part of Surface Tension, where it wasn’t even dark.

This might be a little much, but a fight segment where the HECU cut out the lights and you use their NVGs to spot them would be really cool (kinda like the combine fight in HL2 but without the flares), and it would definitely add a little variety.

You know, it might be a little out of place, but I’ll throw it out anyways. A while ago, I had an idea for a section of On A Rail where the player is given control of a cargo hook, a la the crane in Half-Life 2, and they kill several vorts with it. They then climb down and explore the section that they’ve just cleared… only to have a vort spawn in the controls that they just left and attempt to kill them with the cargo hook.

^ Scripting the second part would be a nightmare…

@Zeroniz
Thanks SO MUCH for posting those schematics…they will be useful longitudinally during development. I’m gonna to relabel these images properly and post them in the pitch bible image gallery for future reference.

@Text
Have you had a chance to thoroughly compare BMS OaR, HL OaR and the pitch bible yet? I ask this because your choice of section placement (2 before BMS C2A2A and 1 after it) is extremely odd (possible unfeasible when comparing dev aesthetics). We can discuss further once you wrap up ST_Uncut, but I think that you’ll end up reaching the same conclusions as me.

As for the rail switching thing as a potential justification, I actually have 2 predictions on what will happen during development:

  1. you’re going to have to decompile the BMS maps at some point for w/e reason
  2. a 4th section might be added to expand on a theme
    If the maps were decompiled, the rail switch could easily be justified by putting busted control panels in the dev’s work while your work has functional panels.

@Maxwell
Vorts can’t use tech in HL1…the crane could potentially be feasible in a materials transport themed section though.

On what’s been said:
Re electrified rails
Huge vote no from me…think the dev’s choice must be respected here because

  1. Practicality (exactly what Chickenprot said)
  2. Sucks for gameplay by severely limiting player mobility
  3. Fucks up AI. HECU can walk on tracks…see BMS C2A2C (Xenians cannot however, which is weird)

Re only water areas on rails causing damage:
Again you’d have to decompile BMS C2A2A; also wouldn’t make sense because rail is not electrified so why would the water area cause damage?

More linearity in OaR (from Gregorovich):
I think the most important factor in creating the sense of travel is the DURATION of the chapter, which is easily addressed by simply adding more content (horizontally). While more linearity might help, it would represent too much of a departure from both HL and BMS OaR. If you study the BMS maps carefully, you’ll find that the dev was EXTREMELY faithful to the sections of HL OaR that were actually incorporated (he even included the loop element of HL C2A2A). He just cut a lot of stuff before and after BMS C2A2B (HL C2A2D). For this reason, I’d argue that Text’s chapters should retain close to that same level of fidelity (especially w/regards to how the rails wind around).

[COLOR=‘lime’]Edit: just uploaded a labeled version Zero’s map 1 to my 2nd post (plus BMS OaR). It’s very simple currently but should help everyone get up to date regarding HL OaR design and see how it compares to the pitch bible. I’m going to delete this image eventually and swap it w/a more detailed version. Does anyone know where I can get a clean image w/o the dev’s doodles? This one is clearly very early in the design Hx as it’s far more ambitious than what ended up in BMS OaR. Also, note that for the purpose of redesign, Zero’s second image is not useful. It’s an early dev concept that looks nothing like either HL or BMS OaR. Best to use the source material for this project.

Ah, but that’s the point. To show that Vorts are intelligent and capable of adapting to new circumstances based on observation, like humans can.

They’re thrown into an environment alien to them, they have no idea about how the controls work. While your observation is sound, the only time they would exhibit behavior as you mentioned in your previous post would be (if at all) in Xen.

Founded in 2004, Leakfree.org became one of the first online communities dedicated to Valve’s Source engine development. It is more famously known for the formation of Black Mesa: Source under the 'Leakfree Modification Team' handle in September 2004.